
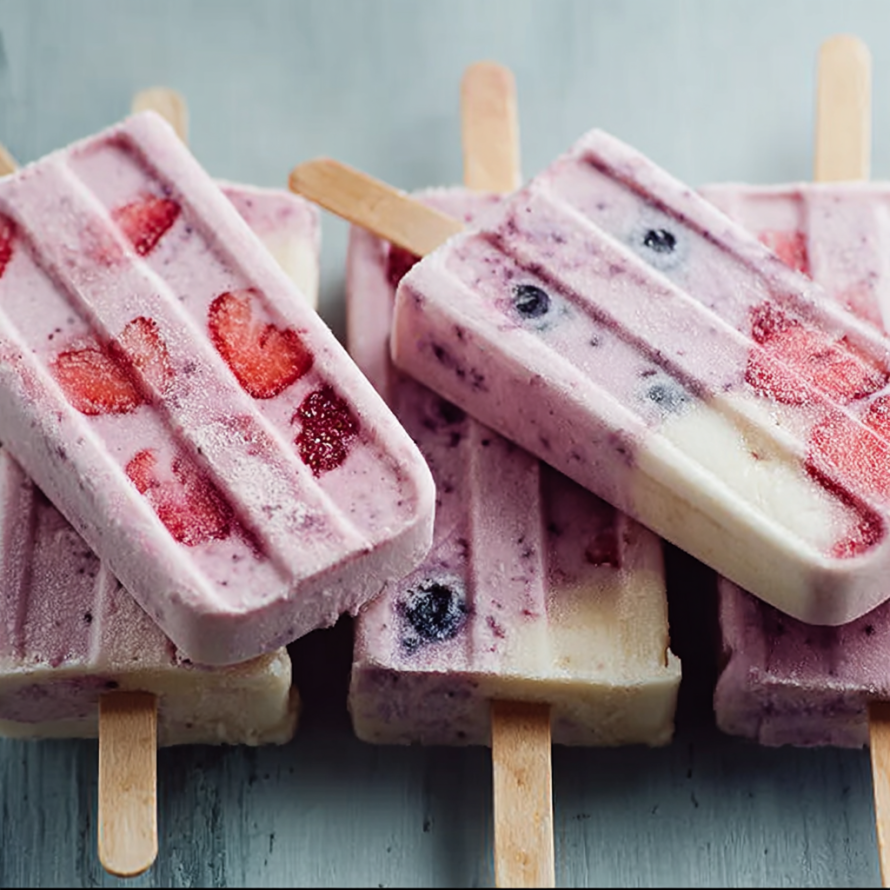
 Pin it
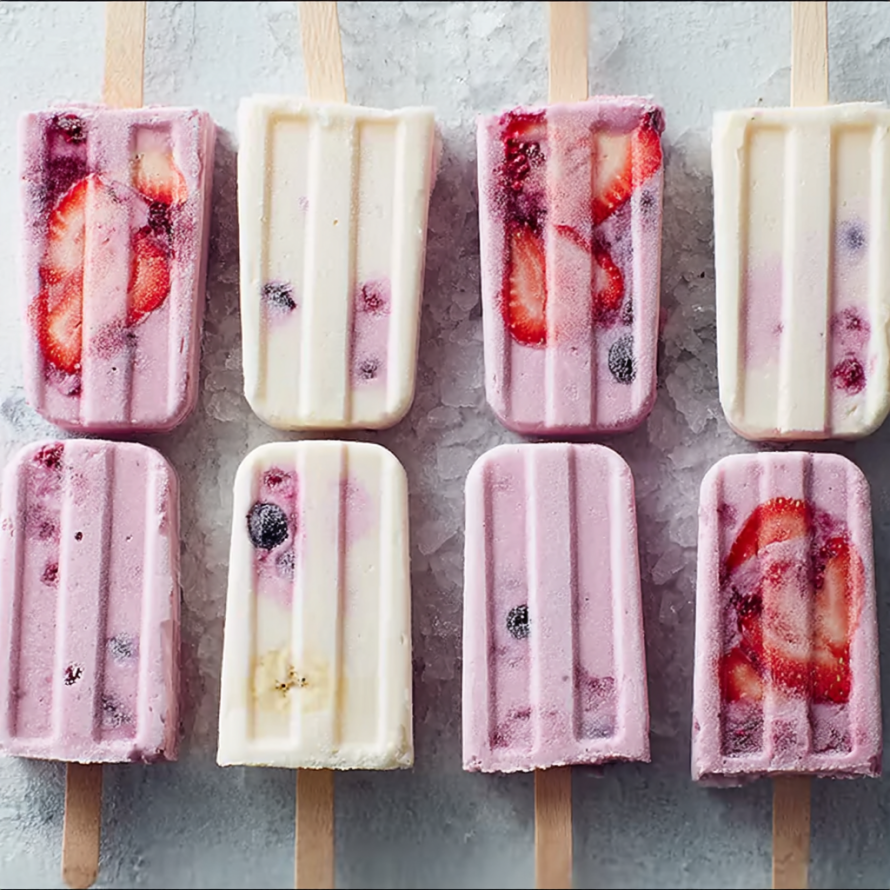
Jamie Oliver’s yogurt popsicles are the solution for those hot summer days when you want something cool and homemade that takes little effort. These popsicles are creamy fruity and naturally sweet without added fuss. They have saved many after-school snack times at my house especially when everyone craves a treat but I want something nourishing and simple.
I started making these yogurt popsicles during a heatwave one July and they disappeared almost as fast as I pulled them from the freezer. Now they are a must in our house all summer and even during winter for a sweet pick me up.
Ingredients
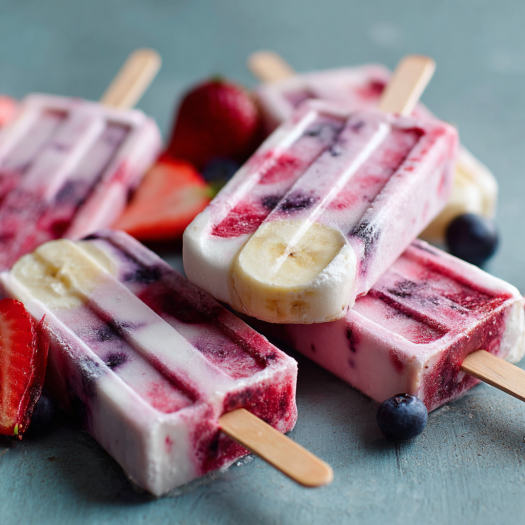
- Ripe bananas: sliced brings natural sweetness and creamy texture choose bananas with brown spots for best flavor
- Frozen strawberries or blueberries: for a beautiful color and fruity burst use in season fruit and freeze yourself for the best flavor
- Plain non fat yogurt: gives these pops their creamy base pick full fat for extra richness or Greek yogurt if you want a thicker treat
- Honey: adds gentle sweetness without being overpowering local honey gives a floral note
Instructions
- Blend Everything:
- Combine the bananas frozen berries yogurt and honey in a blender or food processor. Blend until completely smooth. Scrape down the sides as needed so every bit gets pureed and creamy. The mixture should look rosy and thick like a smoothie.
- Prepare the Molds:
- Spoon or pour the blended mixture evenly into six popsicle molds or small cups. Leave a little headspace at the top to allow for expansion as the pops freeze.
- First Chill:
- Place the molds in the freezer for ten minutes uncovered. This short chill lets the mixture begin to set so sticks or spoons stay upright.
- Insert the Sticks:
- Take the molds out and gently insert popsicle sticks or sturdy spoons into the center of each. The mixture should be thick enough to hold them in place.
- Freeze Until Solid:
- Transfer the molds back to the freezer. Freeze for at least three hours or until very firm all the way through. Overnight is fine if you plan ahead.
- Unmold and Serve:
- To easily unmold run each pop briefly under warm water just a few seconds. Gently wiggle out the popsicle and enjoy right away. They are smooth and creamy straight from the molds.
Blueberries are my favorite for their deep color and tang. I still remember the first time my son helped mash the bananas with sticky hands and we tasted the batch together on our back porch. These moments make simple freezer recipes priceless.
Storage tips
Store finished popsicles in the molds or transfer them to a covered airtight container. Place parchment between layers if you stack them to prevent sticking. These will keep firm and fresh in the freezer for up to two weeks but I have rarely seen them last that long in my home.
Ingredient substitutions
If you do not have bananas try ripe mango or even canned peaches drained well. Maple syrup or agave can swap in for honey. Coconut yogurt is a great non-dairy alternative for anyone avoiding dairy but the creaminess remains. Any soft fruit that blends easily will work so use what is local or in season for you.
Serving suggestions
These popsicles make an amazing after-school snack and are equally perfect for brunch as a cool dessert. Sometimes I roll them in chopped nuts or granola before serving for extra crunch. Let kids help dip the tops in melted chocolate or swirl with a little extra honey for a party treat.
Cultural or Historical Context
Homemade fruit popsicles are found all over the world from Mexican paletas to British ice lollies. Jamie Oliver’s take keeps things straightforward with nutritious bases and no artificial dyes. The kitchen blender makes what used to be a special summer market treat into an everyday snack you can craft at home.
Seasonal Adaptations
Use ripe summer peaches or blackberries for a warm weather twist. In winter try frozen cherries or add a pinch of cinnamon for cozy flavor. Fresh strawberries or raspberries from the farmers market add a bright spring pop.
Success Stories
My niece hated store-bought popsicles but after trying these she keeps asking for more. One family friend started making them using only kiwi and plain Greek yogurt. It is always fun to see what flavor combos others create with the same simple method.
Freezer Meal Conversion
Double or triple the recipe for a family party or to stock your freezer. Just add the mixture to larger molds or even ice cube trays with toothpicks for mini bites. You can blend up the mixture a day ahead and chill in the fridge before freezing if you want to work ahead for a crowd.
Keep a stash in the freezer and watch how fast they disappear on a sunny afternoon. The best part is letting kids help blend and pour the mixture so everyone gets their hands in the making. These yogurt popsicles deliver pure joy with every chilly bite.
Recipe FAQs
- → Can I use different fruits in these pops?
Yes, you can substitute strawberries or blueberries with mango, peach, or other berries for a custom flavor.
- → What kind of yogurt works best?
Plain non-fat or full-fat yogurts both blend well; Greek yogurt gives a thicker, richer result.
- → How long should popsicles freeze before serving?
Freeze for at least 3 hours, or until completely solid, for easy removal from molds.
- → Can I reduce the amount of honey?
You may adjust the honey or omit it entirely, especially if you prefer less sweetness or use very ripe fruit.
- → How do you unmold these pops easily?
Briefly run the molds under warm water and gently remove the pops for easy serving without breaking.