
 Pin it
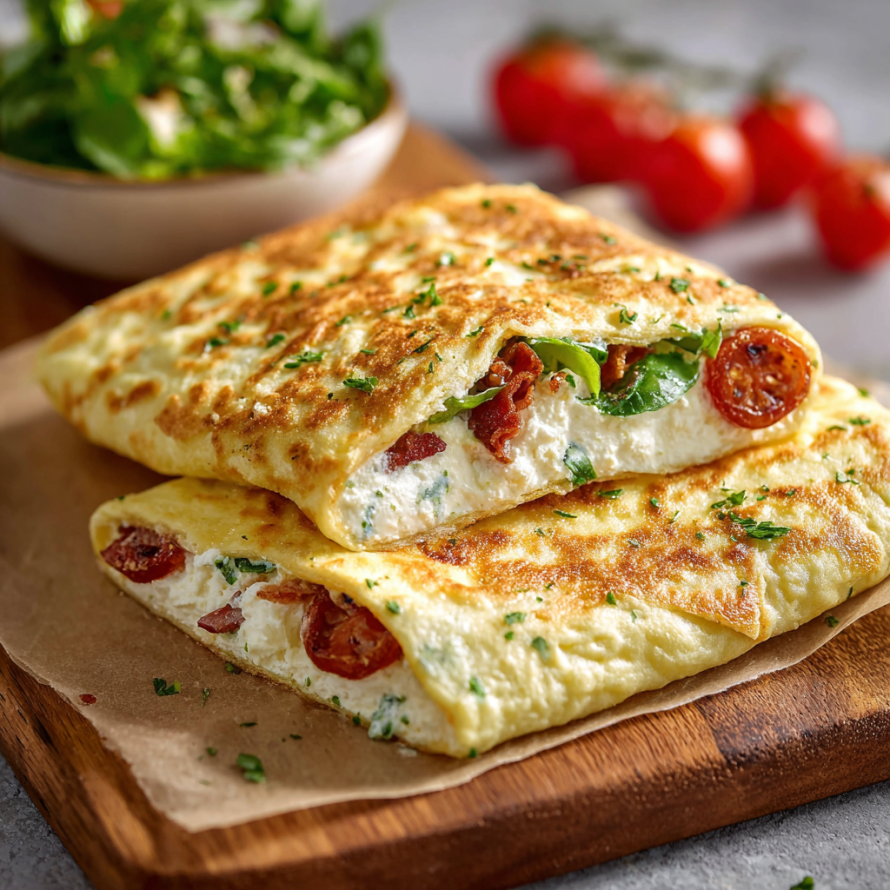
Creamy, protein-packed, and flexible for any meal, these homemade cottage cheese wraps solve the lunch rut and make meal prep extra satisfying. I love whipping up a batch for easy, low-carb snacks or to roll up leftovers from the fridge, and my kids call them "cheesy tortillas" every time.
My first batch disappeared before I could even snap a photo. Now, these wraps have replaced tortillas in our house thanks to their chewy bite and endless filling options.
Ingredients
- Full-fat cottage cheese: provides creaminess and structure look for small curd for the smoothest blend
- Large eggs: build the wrap’s base and give it strength choose fresh eggs for best texture
- Grated Parmesan cheese: boosts salty flavor and helps firm up the wraps opt for real Parmigiano Reggiano if possible
- Garlic powder: adds aromatic flavor and depth use a fresh container for best taste
- Italian seasoning: brings a herby punch try to find a blend without added salt for control
Instructions
- Prepare the Tray:
- Line a large baking sheet with parchment paper to guarantee easy removal after baking use parchment not wax paper since it stands up to heat
- Blend the Batter:
- Place the cottage cheese eggs Parmesan garlic powder and Italian seasoning into a blender or food processor. Blend for one minute. You want an extra smooth and creamy batter with zero lumps scrape down the sides halfway through for even results
- Spread the Mixture:
- Pour the batter onto your lined tray. With a silicone spatula spread it into a thin rectangle the thinner you go the more flexible your wraps will be make sure there are no gaps or thick spots
- Bake to Set:
- Transfer the tray to the center rack of your oven heated to three hundred fifty degrees Fahrenheit. Bake for thirty to thirty five minutes until the surface looks dry and light gold. If the batter still looks shiny bake a few more minutes
- Cool Completely:
- Allow the wrap sheet to cool fully right on the tray. Do not rush this step letting it rest helps the wraps set up and release from the parchment
- Remove and Cut:
- Once cool gently lift a corner to peel off the parchment the whole sheet should come up in one flexible piece. Cut in half to form two large wraps ready for your favorite fillings
- Fill and Enjoy:
- Layer on fillings such as smoked salmon and cream cheese grilled chicken and avocado or a quick scramble of eggs and spinach then roll up and enjoy
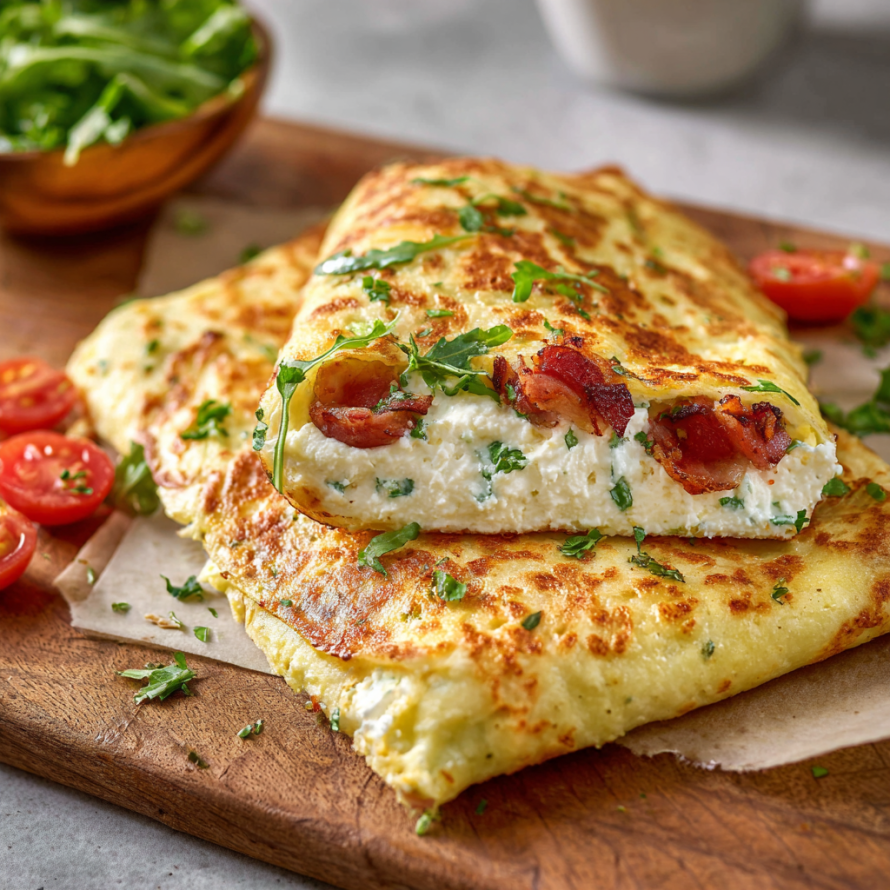
My favorite part of this recipe is finding new ways to fill the wraps I have even tucked in leftover roasted veggies and a swipe of hummus for a satisfying lunch The kids once turned them into pizza roll ups with sauce and mozzarella and declared it the best lunch ever
Storing Your Wraps
Once cooled place wraps between layers of parchment in an airtight container in the refrigerator. They keep well for up to three days and reheat gently in a skillet for best results. Try not to stack without parchment or wraps may stick together
Easy Ingredient Swaps
Swap Parmesan for Pecorino Romano for a sharper bite. Add fresh chopped herbs to the batter or use smoked paprika for a twist. If low fat cottage cheese is all you have just know the wraps will be a touch less tender
Serving Suggestions
Use as a wrap for grilled chicken Greek salad fixings or roasted vegetables. Cut into strips and use as a high protein tortilla alternative for tacos or breakfast rolls. Roll up with nut butter and sliced berries for a sweet snack
A Little Backstory
Wraps like these have been inspired by a wave of protein-forward recipes in European kitchens where cheese and eggs are often the star in easy bakes. The method takes its cue from flourless Scandinavian flatbreads and simple cottage cheese pancakes that save the day when bread is out of stock. Making these wraps has become my go-to move whenever the bread box is empty or I want a lighter lunch option
Seasonal Adaptations
Try adding fresh chives or basil in spring for brightness. Swap Italian seasoning for taco-style spices for summer wraps. In autumn roasted squash or sweet potato mash makes a perfect filling
Notes for Best Results
Blending until creamy gives the wraps extra flexibility. Good parchment paper is essential to avoid sticking. Letting the base cool fully is the single most important step for wraps that do not tear
Success Stories
Every time I serve these wraps for a group brunch the tray empties in seconds even among picky eaters I once made a double batch for a picnic and there was not a single scrap left over The versatility keeps everyone happy especially with a DIY toppings bar
Freezer Friendly
Lay cooled wrap sheets between pieces of parchment paper and place flat in a freezer bag. Freeze for up to two months and thaw overnight in the refrigerator. Refresh in a warm pan before filling for the best taste
These wraps are a staple in our kitchen for fast, nourishing meals. Keep a stash on hand and enjoy endless filling possibilities all week long.
Recipe FAQs
- → How do I prevent the wraps from sticking to the tray?
Line your baking tray with parchment paper and ensure the mixture is spread evenly before baking for easy removal.
- → Can I use low-fat cottage cheese instead of full-fat?
Full-fat provides better texture and richness, but low-fat can be used with slightly less creamy results.
- → What are some filling ideas for these wraps?
Try combinations like smoked salmon and cream cheese, grilled chicken and avocado, or roasted vegetables and feta.
- → How do I store leftover wraps?
Keep cooled wraps in the refrigerator, wrapped tightly or in an airtight container, for up to 3 days.
- → What is the best way to make the batter smooth?
Blend ingredients until completely silky using a blender or food processor for the most even, flexible wraps.
- → Can these wraps be made ahead of time for meal prep?
Yes, they keep well when cooled, making them ideal for meal prep and quick lunches throughout the week.