
 Pin it
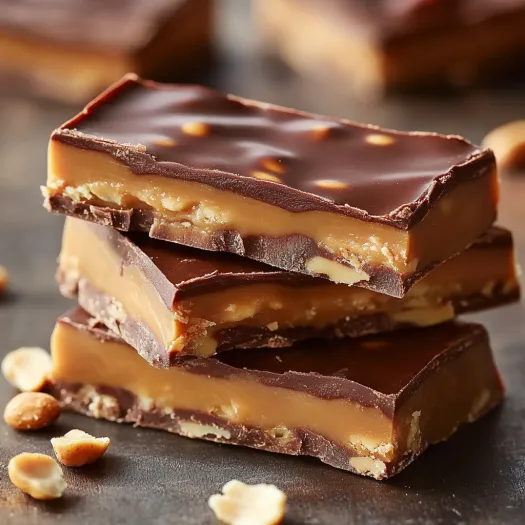
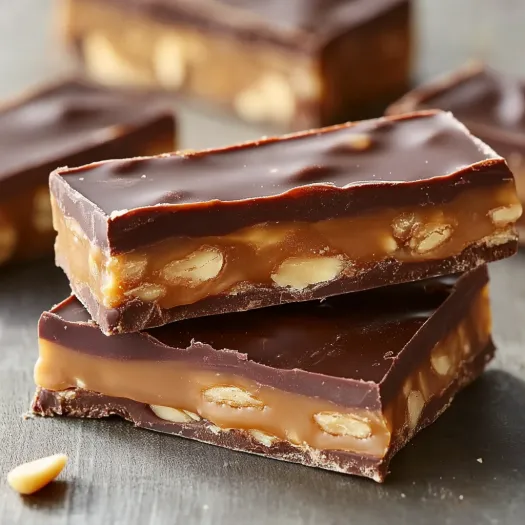
This no-bake peanut, caramel and chocolate candy bar recipe brings all the nostalgic flavors of a beloved store-bought candy bar right into your kitchen. The layered treat combines rich chocolate, fluffy nougat, crunchy peanuts and gooey caramel for an irresistible homemade version that surpasses anything from the candy aisle.
I first made these bars for my nephew's birthday party when the store was sold out of his favorite candy. They were such a hit that the adults demolished them before the kids even got a chance, and now they're requested at every family gathering.
Ingredients
- Chocolate chips: Add the essential rich foundation and glossy topping. Look for high quality chips with a cocoa content of at least 60% for the best flavor.
- Butterscotch chips: Contribute a unique caramelized sweetness to the base layer. The subtle toffee notes enhance the overall flavor profile.
- Creamy peanut butter: Appears in multiple layers adding signature nutty flavor and helping bind ingredients. Choose a commercial brand like Jif or Skippy for consistent results.
- Marshmallow crème: Creates the pillowy nougat layer. Make sure it's fresh and not dried out for proper texture.
- Salted cocktail peanuts: Provide essential crunch and savory contrast. The rough chop ensures good texture while keeping pieces large enough to identify.
- Caramels: Use unwrapped store-bought caramels for convenience and consistent results. Look for soft fresh ones without any hardened edges.
- Heavy whipping cream: Enriches both the nougat and caramel layers with silky texture. The high fat content prevents graininess in the sugar mixtures.
Step-by-Step Instructions
- Prepare the Pan:
- Line your 13x9-inch baking pan with parchment paper ensuring it extends up the sides for easy removal later. Press the paper into corners and smooth out any wrinkles for even layers.
- Create the Foundation:
- Combine chocolate chips, butterscotch chips and peanut butter in a microwave-safe bowl. Microwave in careful intervals stirring thoroughly between each until completely smooth. Pour this glossy mixture into your prepared pan and spread it into an even layer reaching all corners. The thickness should be about 1/8 inch. Refrigerate until completely firm which takes about 30 minutes.
- Craft the Nougat Layer:
- In a medium saucepan combine sugar, butter and whipping cream, bringing the mixture to a controlled boil over medium heat. Maintain the boil for exactly 5 minutes while stirring constantly to prevent scorching. This precise cooking creates the perfect soft texture. Remove from heat and immediately stir in marshmallow crème, peanut butter and vanilla working quickly before the mixture begins to set. Fold in the chopped peanuts ensuring even distribution then spread this fluffy mixture over the chilled chocolate layer. Refrigerate again for 30 minutes.
- Add the Caramel Layer:
- Place unwrapped caramels and whipping cream in a microwave-safe bowl. Heat carefully stirring between intervals until completely melted and smooth. The mixture should be thick but pourable. Spread this warm caramel evenly over the chilled nougat layer working quickly before it sets. Refrigerate for another 30 minutes.
- Finish with Chocolate Topping:
- Combine the remaining chocolate chips and peanut butter in a microwave-safe bowl melting as before until perfectly smooth. Pour over the caramel layer spreading to create a thin even coating that reaches all edges. Refrigerate for at least one hour before cutting into bars.
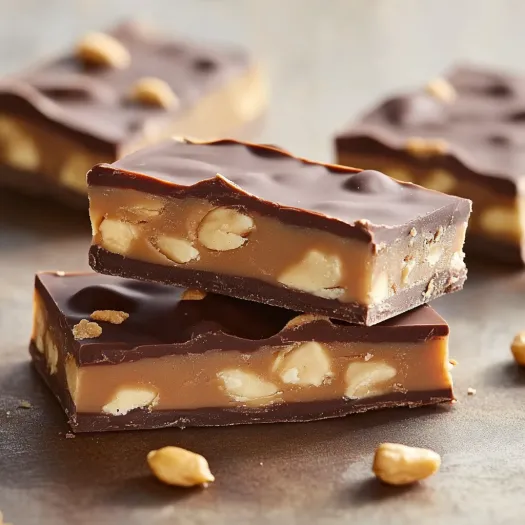
The marshmallow nougat layer is what truly transforms these from ordinary candy bars to something special. The first time I made these, my daughter declared them better than any store-bought version and insisted we keep the recipe a family secret for years!
Storing Your Candy Bars
These homemade candy bars require refrigeration to maintain their perfect texture and prevent the chocolate from melting. Store them in an airtight container with parchment paper between layers to prevent sticking. They'll keep beautifully for up to two weeks in the refrigerator though they rarely last that long in my house! For longer storage you can freeze them for up to three months. Just thaw in the refrigerator before serving.
Making Ahead and Gifting
These bars make excellent gifts since they can be prepared several days in advance. For gifting wrap individual squares in waxed paper or candy foil then place in decorative tins or boxes. I like to make a double batch during the holiday season and create beautiful gift packages for neighbors and coworkers. Just be sure to keep them refrigerated until shortly before gifting and include a note to refrigerate upon receipt.
Clever Variations
While the classic version is perfect you can easily customize these bars. Try using different nuts like almonds or cashews in place of peanuts. For a more complex flavor swap in dark chocolate chips or add a teaspoon of espresso powder to the chocolate layers. During the holidays I sometimes add crushed candy canes to the top layer or mix in toffee bits with the peanuts. The recipe is wonderfully versatile while maintaining that nostalgic candy bar experience.
Serve slightly chilled for the best flavor and texture—truly a treat loved by all generations.
Recipe FAQs
- → Can I use different types of chocolate chips for this recipe?
Yes! The recipe specifically mentions you can use semi-sweet, milk, or dark chocolate chips based on your preference. You could even mix different types for more complex flavor.
- → How should I store these candy bars?
Store the bars in an airtight container in the refrigerator. The multiple layers, especially the caramel, will soften at room temperature.
- → Can I substitute the marshmallow creme?
If you can't find marshmallow creme, you can make your own by melting about 2 cups of mini marshmallows with 2 tablespoons of corn syrup in the microwave, stirring until smooth.
- → Why do I need to chill between layers?
Chilling between layers is crucial to prevent them from mixing together. Each layer needs to set firmly before adding the next to maintain distinct layers in the final bars.
- → Can I make these bars without peanuts for allergy concerns?
For a peanut-free version, substitute the peanut butter with almond or sunflower seed butter, and replace the peanuts with other crunchy elements like crispy rice cereal, chopped pretzels, or other nut varieties if those aren't problematic.
- → How far in advance can I make these bars?
These bars can be made up to 5 days in advance when stored properly in the refrigerator. You may want to cut them just before serving for the cleanest edges.