
 Pin it
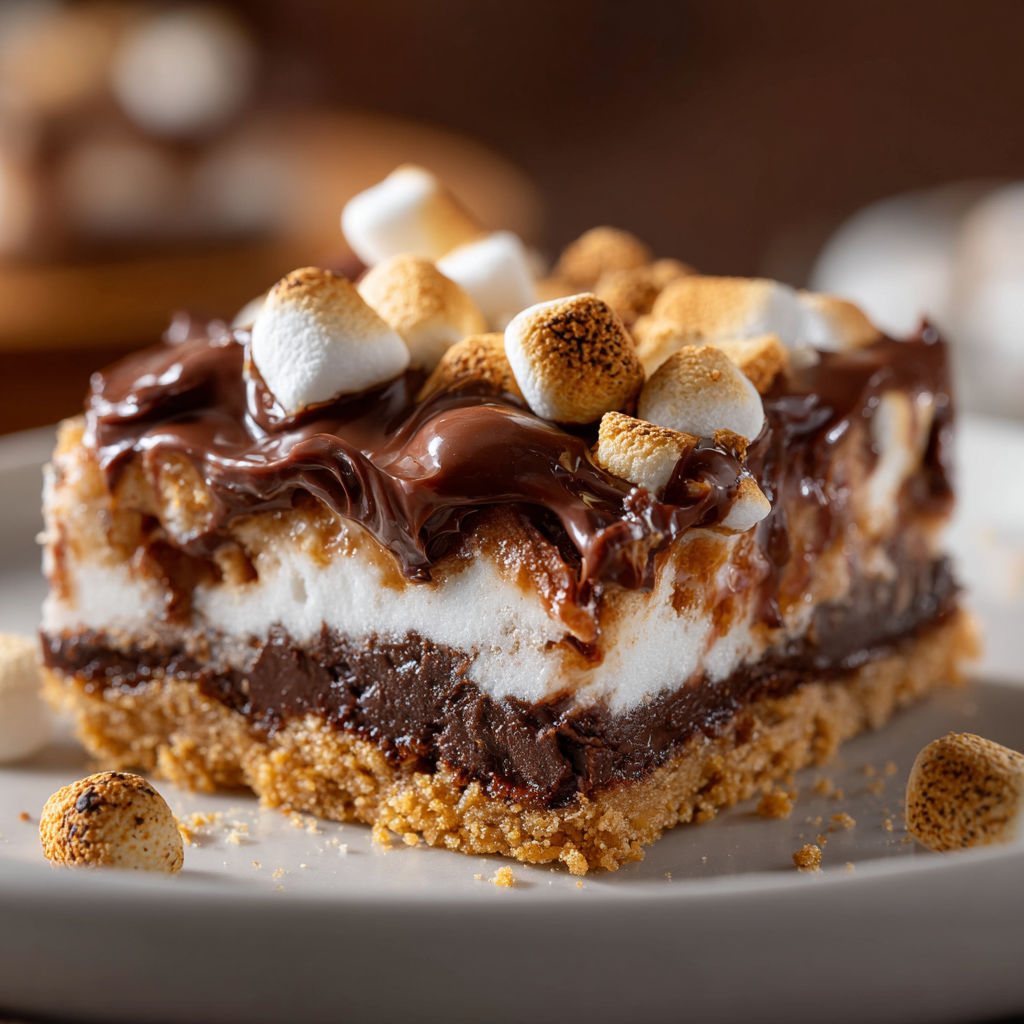
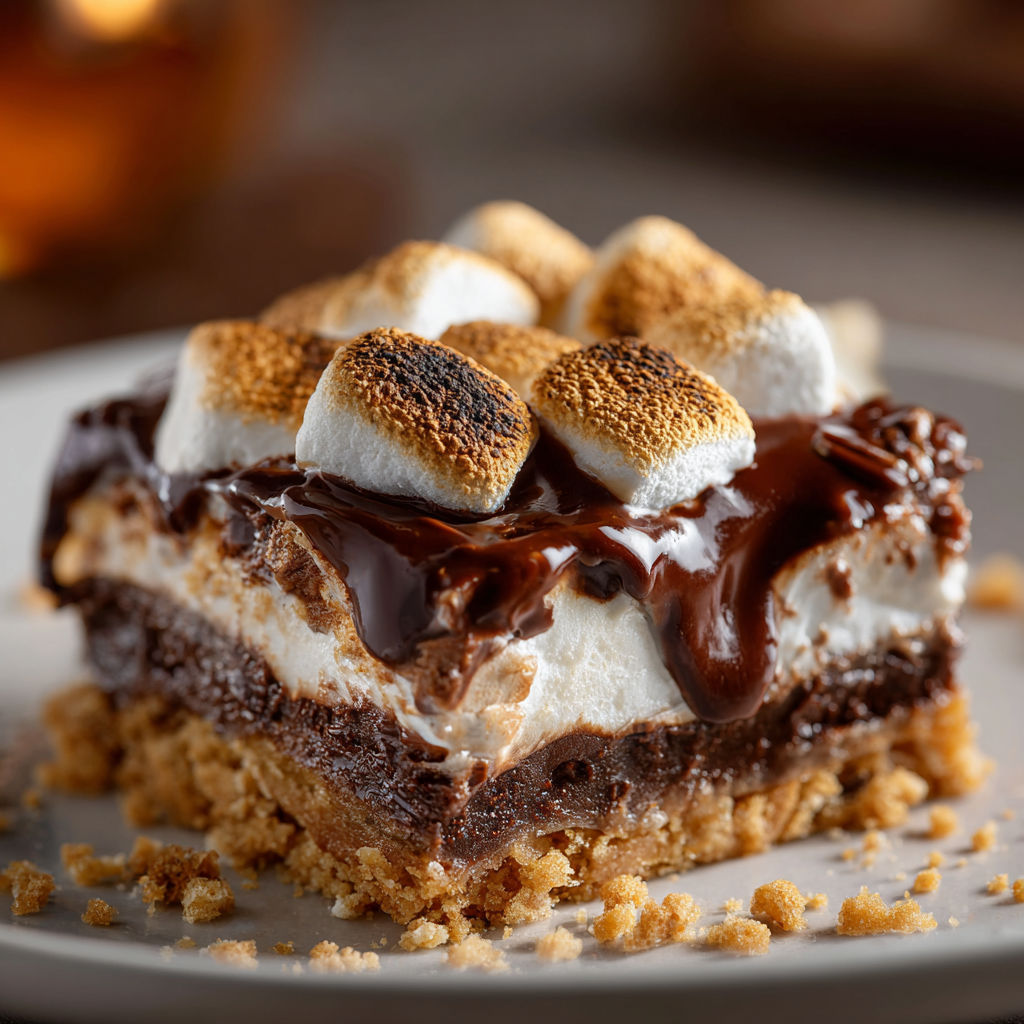
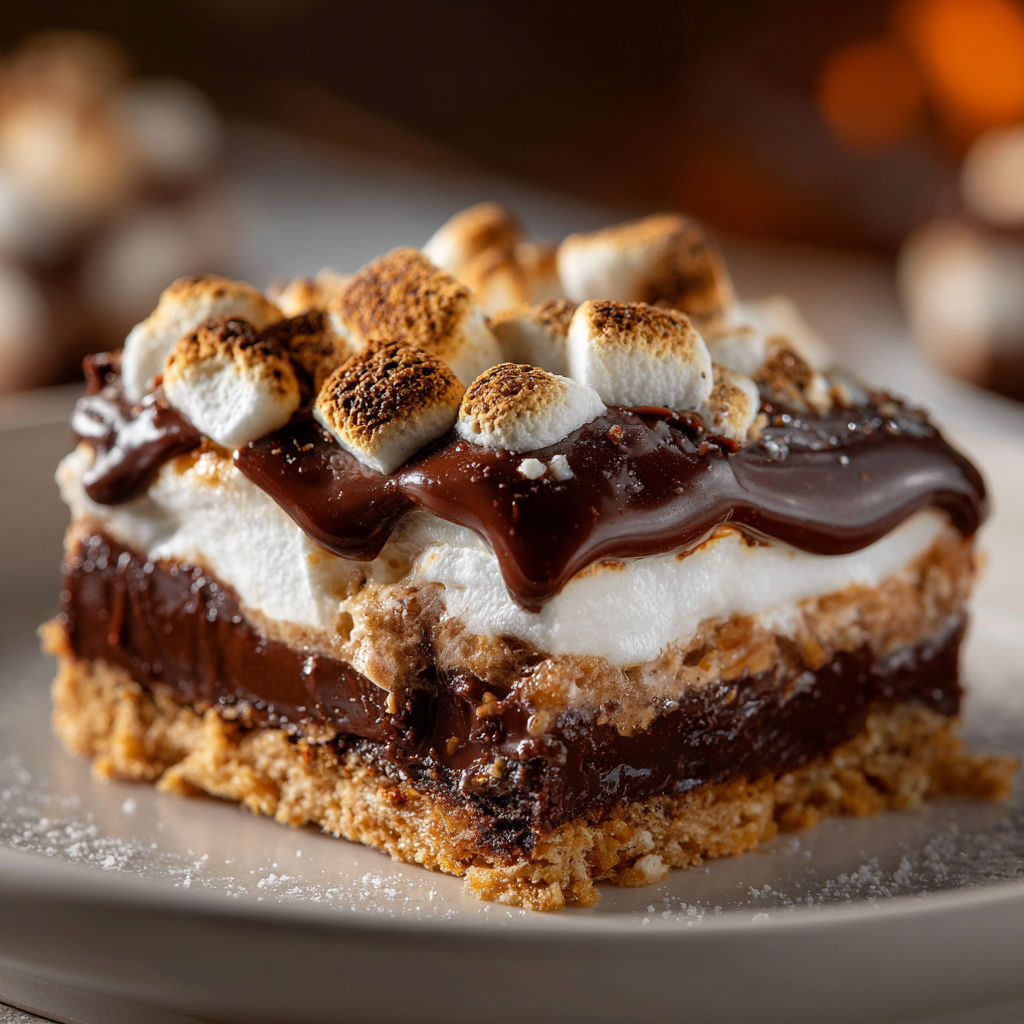
There are days when nothing but gooey s’mores will do and making them into bars means you can share that marshmallow chocolate happiness in every bite without a campfire or fuss. These s’mores bars bring all the nostalgia and flavor of classic s’mores to your kitchen with just a few ingredients and even less mess.
I first brought these to a family birthday and was shocked at how quickly they disappeared. Now there is never a summer gathering without a batch made ahead so everyone can relive that fireside magic.
Ingredients
- Graham cracker crumbs: create the perfect crisp base and classic s’mores taste use fresh for best texture
- Powdered sugar: lends a touch of sweetness and softens the base use pure not blended with cornstarch
- Butter: binds the crust and brings rich flavor use good quality real butter for best results
- Hersheys chocolate bars: melt just right and taste just like the originals break them up to cover the crust evenly
- Mini marshmallows: blanket the top for gooeyness check that your bag is soft and fresh for the best toast
Instructions
- Make the crust:
- Mix your graham cracker crumbs powdered sugar and melted butter in a bowl using a spoon until the mixture looks like damp sand. Press firmly into a greased 9 by 13 inch baking pan covering the bottom and sides with even pressure using your hands. Packing it well helps the bars hold together
- Prebake the crust:
- Slide the pan into a 350 degree Fahrenheit oven and bake for five to eight minutes. Watch for the edges to just start turning golden brown. Remove the pan and let it cool so the base sets and keeps its crunch
- Layer the chocolate:
- Lay out your chocolate bars right over the warm crust using your hands to cover as much as possible. It is fine if the bars break just piece them together to cover the surface
- Melt the chocolate:
- Return the pan to the oven for about three minutes. You want the chocolate to look shiny and slightly melty but not bubbling. Remove the pan and let it cool for a minute
- Add the marshmallows:
- Scatter mini marshmallows over the melted chocolate making sure to pack them in close. The tighter you place them the gooier your bars will be
- Broil for the finish:
- Switch your oven to broil and quickly toast the marshmallows for about two minutes watching closely. Look for golden pillowy tops and pull them out as soon as they reach your favorite level of toast
- Cool and slice:
- Wait until the bars cool completely so the chocolate can set. Use a sharp knife run under hot water to slice cleanly and avoid dragging marshmallow strands
The marshmallows have been my favorite part since I was little and I still sneak an extra handful on top when nobody is looking. My nieces call these cloud bars because of the sweet sticky layer and ask me to make them on every visit.
Storage Tips
Once cool cut bars and store them in an airtight container at room temperature for up to three days. If you want to preserve their melty texture rewarm individual bars in the microwave for a few seconds. To prevent sticking lay parchment between layers in your container.
Ingredient Substitutions
You can use milk chocolate chips or a chopped chocolate bar instead of Hersheys if that is what you have on hand. If you need a gluten free option swap in your favorite GF cookies or graham style biscuits and crush them well. For a fun twist try adding a pinch of cinnamon to the crust mixture.
Serving Suggestions
Serve these s’mores bars warm from the oven or bring them along to a picnic or school event. Cut into smaller squares for a bite size treat or use a drizzle of caramel or sea salt for a restaurant worthy touch. For a summer party set up a s’mores bar with toppings like peanut butter chips or raspberries to sprinkle on top.
Cultural and Historical Context
Classic s’mores date back to American camping traditions from the 1920s and the name comes from asking for some more. Turning them into bars lets you enjoy their spirit all year without worrying about weather or open flames and is now a potluck staple for good reason.
Seasonal Adaptations
Try adding Chopped fresh strawberries right under the marshmallows in summer A layer of peanut butter for extra richness when it is cold out Pumpkin pie spice mixed into the crust for fall parties
Success Stories
A neighbor made these bars for their child’s bake sale and told me they sold out before lunch. Another friend brought them to a winter potluck and everyone asked for the recipe before the pan was empty. It is a crowd favorite every time.
Freezer Meal Conversion
If you want to make these ahead freeze the sliced cooled bars individually wrapped in plastic and then sealed in a bag. Thaw at room temperature before serving or give them a five second zap in the microwave to bring back that melty marshmallow goodness.
S’mores bars bring a taste of summer to your kitchen any time of year. Share them with family and friends for instant smiles and sweet memories.
Recipe FAQs
- → Can I use regular marshmallows instead of mini?
Yes, just cut them into smaller pieces for even toasting and coverage.
- → What type of chocolate works best?
Classic milk chocolate bars melt smoothly, but dark or semi-sweet chocolate can also be used for richer flavor.
- → How do I prevent the marshmallows from burning?
Broil the bars for a short time and watch closely to achieve a golden top without overcooking.
- → Can these bars be made ahead?
Yes, let them cool, cut into squares, and store in an airtight container for easy serving later.
- → How should I store leftover bars?
Store at room temperature in a sealed container for up to three days to keep them fresh.