
 Pin it
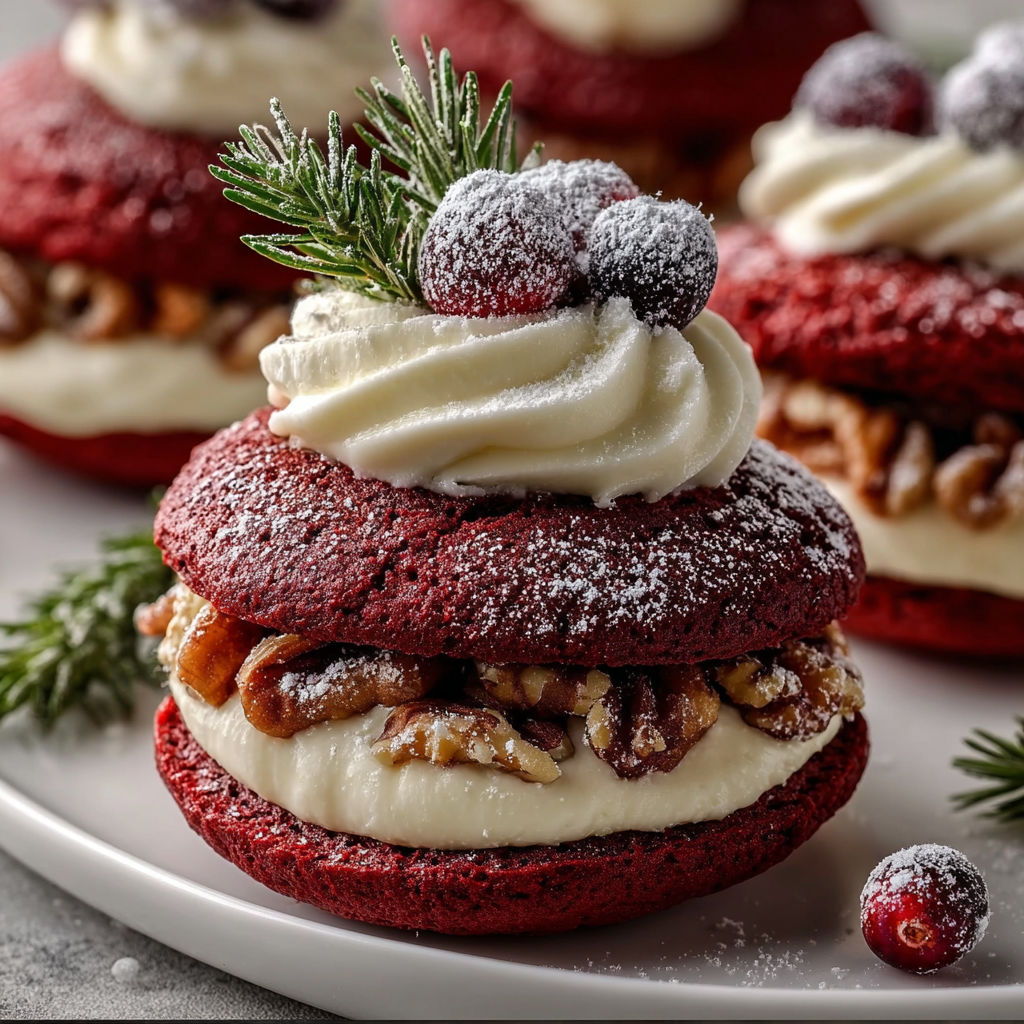
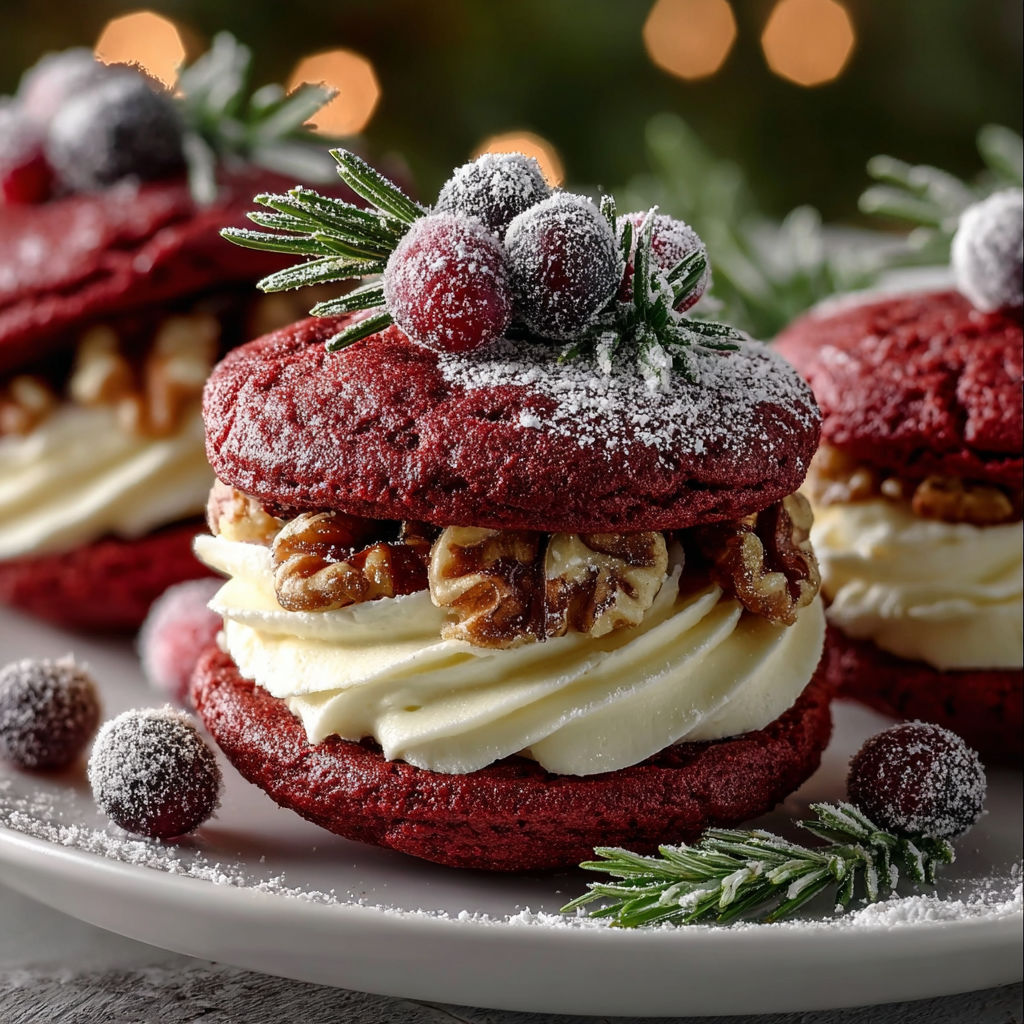
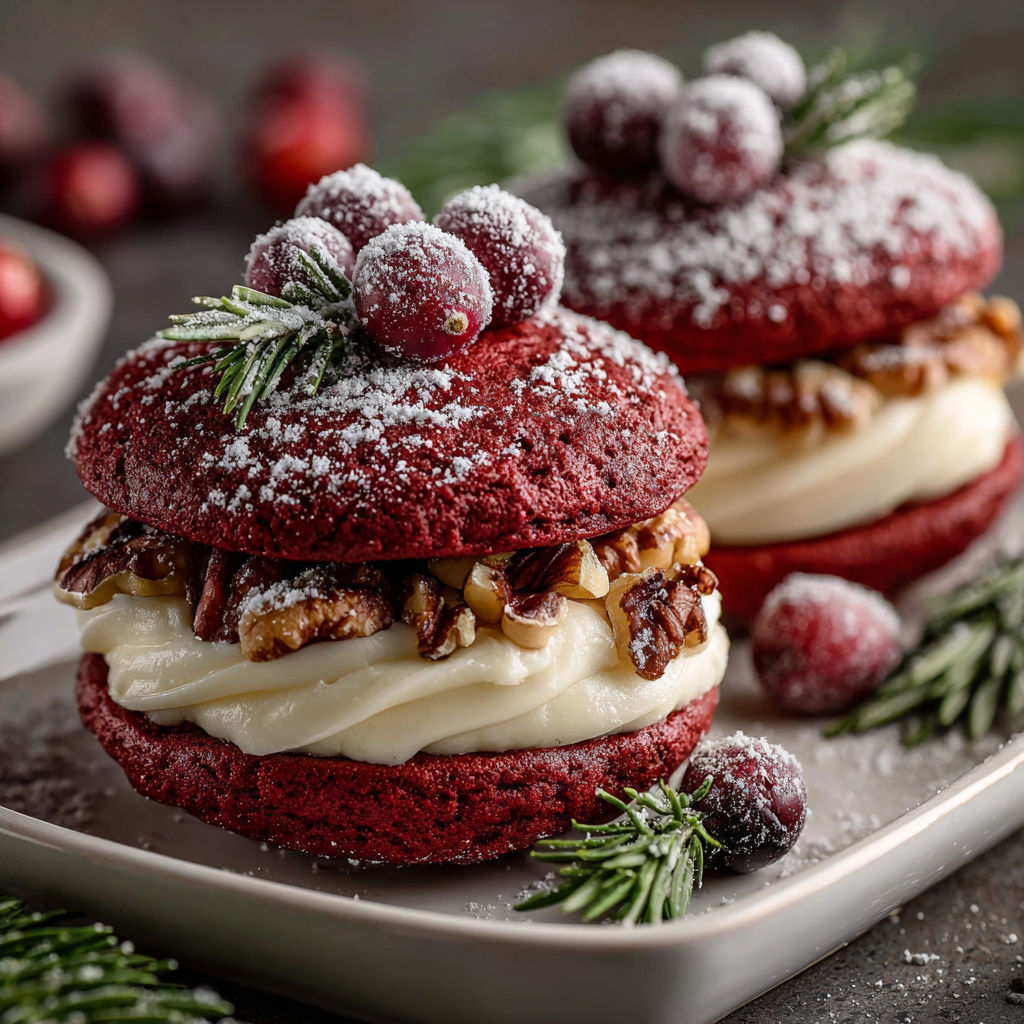
Red Velvet Wreath Whoopie Pies are my favorite holiday bake for both their festive look and nostalgic flavor. These delicate cake sandwiches are plush and cocoa-scented, holding a tangy cream cheese filling that is rolled in candied walnuts and crowned with rosemary sprigs and jewel-toned berries. Each one looks like a snowy wreath ready to brighten up any dessert tray and they are such a fun baking project to share with kids or friends.
The first time I made these was for a Christmas cookie swap and everyone asked for the recipe. Now it is a tradition and my family will not let the season pass without a batch.
Ingredients
- All purpose flour: provides structure and helps the pies hold their signature shape use a fresh bag if possible for best texture
- Unsweetened cocoa powder: gives a subtle chocolate note choose high quality dutch process for richer color and taste
- Baking soda: gives lift and ensures a cake-like crumb check freshness
- Salt: balances sweetness and sharpens all other flavors
- Unsalted butter: makes the cakes tender while pure butter flavor shines through buy the best butter you can
- Light brown sugar: adds moisture and an almost caramel flavor
- Large egg: binds the batter and helps it rise properly
- Buttermilk: keeps everything incredibly soft and offers tang select whole buttermilk if you can find it
- Red food coloring: provides the iconic red velvet look look for gel coloring for vibrant color without excess liquid
- Vanilla extract: rounds out the flavors and gives that classic bakery aroma pure extract works best
- Cream cheese: ensures the filling is creamy and tangy let it fully soften for smoothness
- Powdered sugar: is key to a fluffy frosting sift before measuring for lump free icing
- Candied walnuts: bring crunch and a holiday feel chop them fine so they stick well
- Fresh cranberries or blackberries: add natural color and tartness
- Rosemary or cedar sprigs: are for visual pop and an herbal touch if you have access to fresh local herbs they make the pies stand out
- Powdered sugar for dusting: creates a snowy effect just before serving
Instructions
- Make the Dry Mix:
- In a medium bowl whisk together flour cocoa powder baking soda and salt for at least thirty seconds. This ensures the cocoa distributes evenly and nothing is clumped. Use a balloon whisk and lift the mixture to aerate it. If your cocoa is especially lumpy sift it separately first.
- Cream the Butter and Sugar:
- In a large bowl beat the softened butter with the brown sugar using a handheld mixer on medium speed for at least two full minutes. Watch the mixture turn pale and fluffy. Scrape down the sides often as this stage traps air for light whoopie pies.
- Mix Wet Ingredients and Color:
- Add the egg and continue beating just until fully incorporated. Pour in the buttermilk vanilla and food coloring. If using liquid coloring aim for an even tone. Mix until the batter is a uniform deep red no streaks should remain.
- Combine and Stir:
- Gradually add your dry mix to the wet mixture using a spatula or mixer on low. Pause often to scrape down the bowl. Stir gently only until no dry flour remains to avoid tough cakes. The batter should look thick and scoopable.
- Shape and Bake:
- With a large spoon or piping bag fitted with a plain tip portion out two inch rounds onto your parchment lined sheet spacing them at least two inches apart. The rounds should be mounded with a slight dome. Bake at three hundred fifty degrees Fahrenheit for ten to twelve minutes. A gentle press should bounce back when done. Cool on the sheet for five minutes to set their shape then transfer to a rack.
- Prepare the Filling:
- In a clean bowl use a mixer to beat softened cream cheese and butter until glossy and fully blended. Add powdered sugar and vanilla in stages. Whip until the filling is fluffy and smooth. If the frosting is too soft for piping chill for ten minutes.
- Assemble the Sandwiches:
- Pipe or spread a generous layer of filling on the flat side of one cake. Gently roll the frosted edge in chopped candied walnuts pressing lightly so they stick. Top with another cake and sandwich gently together.
- Decorate and Finish:
- Use a smaller piping tip or spoon to swirl frosting on top of each assembled pie. Nestle a few fresh berries and one or two rosemary sprigs into the swirl. Right before serving sift powdered sugar over the tops to create the look of fresh snow.
My favorite part is the scent of rosemary and butter as you dust with powdered sugar. Last year my nephew helped roll the edges in nuts and he kept sneaking bites of the frosting every chance he got. These pies always draw people together.
Storage tips
Store whoopie pies in a tightly closed container lined with parchment layers. They will stay soft for at least three days at room temperature or up to five days refrigerated. If storing with garnish add the rosemary and fruit just before serving to keep them fresh looking. For freezing wrap each assembled pie in plastic and place in a freezer bag. Thaw at room temperature for several hours before eating.
Ingredient substitutions
For a nut free version omit candied walnuts or use sunflower seeds. If buttermilk is unavailable add one teaspoon of lemon juice to regular milk and let it sit for five minutes. For a gluten free option use a one to one gluten free baking flour blend.
Serving suggestions
Arrange the pies in a wreath shape on a round tray with extra sprigs and berries scattered for a centerpiece effect. Pair with hot cocoa or spiced tea for a cozy winter treat. These also make beautiful gifts packaged in clear cellophane bags tied with velvet ribbon.
Cultural and historical context
Red velvet cake has roots in American Southern baking loved for its tender crumb and cheerful color. Whoopie pies come from Pennsylvania Dutch and New England traditions and are said to bring a happy surprise to anyone who receives them. The combination here gives you the best of both classics in one festive bite.
Seasonal Adaptations
Use candied pecans or pistachios in place of walnuts for spring. Try blackberries or blueberries for summer gatherings. Swap in sugared cranberries for extra sparkle at Christmas.
Success Stories
My sister made a double batch for her office party and they were gone before lunch break. Kids love assembling their own with different toppings and my aunt said these pies were her favorite of all the holiday cookies because they stay soft for days.
Freezer Meal Conversion
Bake and cool the cakes completely. Freeze them unfilled in a single layer first then stack with parchment to store for up to two months. When ready to serve make the frosting and assemble after thawing. Decorate with fresh fruit and herbs at the last minute for best appearance and freshness.
Each bite tastes like holiday cheer and cozy family moments. These whoopie pies are a joy to bake and even better to share.
Recipe FAQs
- → How do I achieve the vibrant red color?
Use red food coloring for a deep hue. Gel coloring works best for rich, consistent color.
- → Can I substitute the berries for other toppings?
Yes, try pomegranate seeds, gold sprinkles, or sugared cranberries for different flavors and effects.
- → How do I keep the whoopie pies soft?
Avoid overbaking and store them in an airtight container to maintain their soft texture.
- → Can I make the cream cheese filling ahead of time?
Yes, prepare and refrigerate the filling. Bring to room temperature before piping for smooth consistency.
- → What is the best way to assemble the pies neatly?
Use a piping bag for both the rounds and filling, and chill the filling if it becomes too soft to work with.