
 Pin it
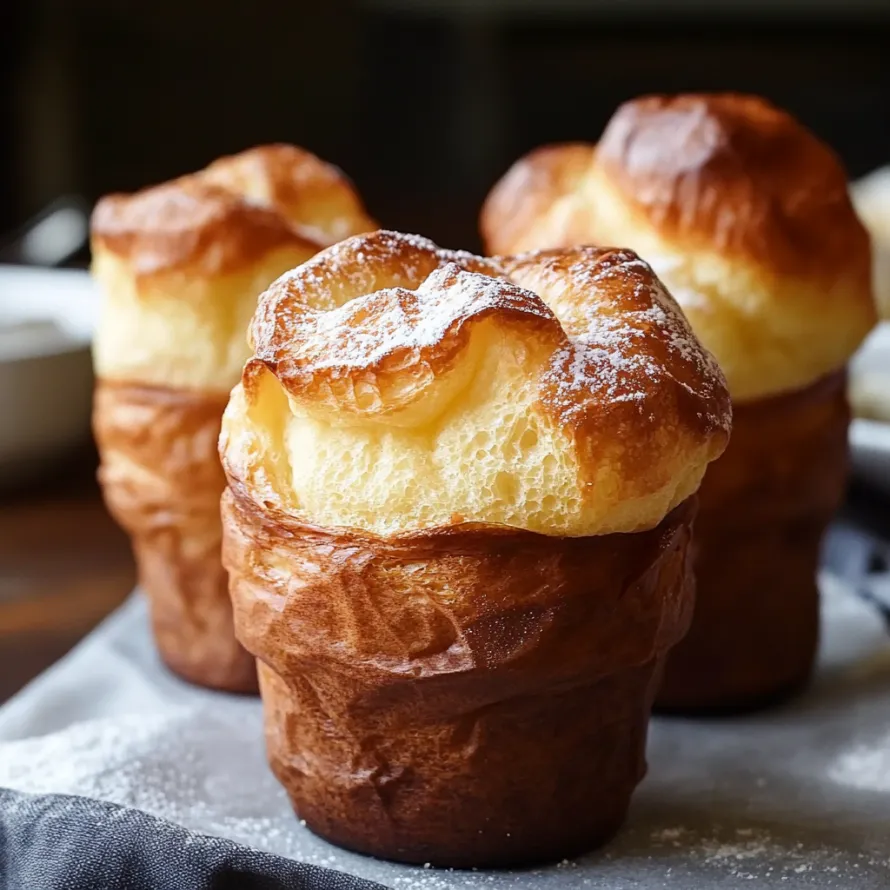
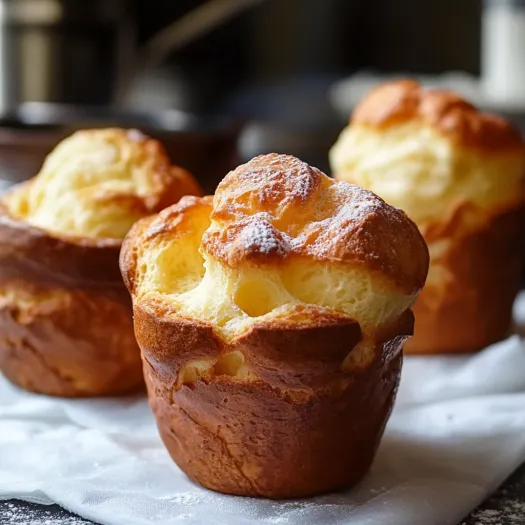
This popover recipe creates the most dramatically tall, airy, and crispy-on-the-outside, tender-on-the-inside treats you'll ever pull from your oven. I've been perfecting this recipe for years, finding the exact techniques that guarantee that impressive rise every single time.
I first discovered the magic of popovers during a holiday dinner at my grandmother's home. Her recipe card had little notes in the margins about warming the eggs and not opening the oven door during baking these little secrets made all the difference.
Ingredients
- Eggs: Room temperature eggs are crucial for maximum rise
- Milk: Whole milk creates the richest flavor but any milk works
- Salt: Enhances all the flavors and balances the richness
- All purpose flour: Provides the perfect structure without heaviness
- Melted butter: Adds richness and helps create that golden exterior
Step-by-Step Instructions
- Warming the Eggs:
- Place uncracked eggs in a bowl of hot tap water for 10 minutes. This gentle warming helps the batter rise dramatically in the oven. Cold eggs directly from the refrigerator will significantly hamper your popovers' height.
- Preparing Your Oven and Pan:
- Position your oven rack low to accommodate the impressive rise these popovers will achieve. Preheat to 450°F which creates the initial steam burst that makes popovers pop. Be thorough when greasing your popover pan including the top edges as the batter will climb up and could stick.
- Creating the Base Batter:
- Whisk eggs milk and salt until completely combined with no visible streaks of egg white. The mixture should look homogeneous and slightly frothy which indicates you're incorporating air a key to success.
- Incorporating the Flour:
- Add flour and whisk vigorously until the batter becomes frothy and most lumps disappear. Don't overmix to the point of developing gluten but do ensure it's well combined. Small lumps are acceptable but large ones will affect the texture.
- Adding the Butter:
- Quickly stir the melted butter into the batter. The butter should be warm but not hot enough to cook the eggs. This final addition adds richness and helps create that beautiful golden crust.
- Filling and Baking:
- Pour batter into the prepared cups filling each about 3/4 full. Place immediately into the preheated oven. The high initial temperature creates the steam that causes the dramatic rise. Reducing the temperature partway through allows the structure to set without burning.
The warm egg technique is something I discovered after many disappointments with flat popovers. My family now knows not to disturb my egg warming ritual before Sunday brunch it's become a sacred part of our tradition and the results speak for themselves.
The Perfect Popover Pan
A dedicated popover pan is worth the investment if you love these treats. The deep straight sided cups allow maximum rise and airflow around each popover. If you don't have one a muffin tin will work but expect slightly less dramatic results. Metal conducts heat better than silicone or glass alternatives making it the ideal material for the crispiest exterior.
Sweet and Savory Variations
These popovers provide the perfect canvas for countless flavor additions. For sweet versions add 2 tablespoons of sugar to the batter and serve with jam butter and powdered sugar. Savory versions shine with additions like 1/4 cup grated parmesan cheese and 1 tablespoon chopped herbs folded into the batter just before baking. My family favorite is adding 1 teaspoon of finely grated lemon zest and a sprinkle of poppy seeds.
The Science Behind the Rise
Understanding what makes popovers rise helps guarantee success. The dramatic inflation comes from steam created as the liquid in the batter heats up. The high protein content of the eggs creates a structure that traps this steam allowing the popover to expand. The initial high heat is crucial for that steam development while the reduced temperature later allows the structure to set without burning. This is why room temperature ingredients and a properly heated oven are non negotiable for tall impressive popovers.

These popovers are sure to impress your guests and leave them asking for seconds—enjoy!
Recipe FAQs
- → Why do I need to warm the eggs first?
Warming the eggs before mixing helps create a better emulsion in the batter, resulting in a higher rise and fluffier texture in your popovers. The warmed eggs incorporate more air when whisked, contributing to that signature hollow interior.
- → Can I use a muffin tin instead of a popover pan?
Yes, you can use a muffin tin instead of a popover pan, though the popovers won't rise quite as high. Be sure to thoroughly grease the muffin cups and fill them about 3/4 full. The cooking time may need slight adjustment.
- → Why do popovers sometimes collapse?
Popovers can collapse if removed from the oven too early, if the oven door is opened during baking, or if the batter wasn't properly aerated. The two-temperature baking method helps prevent collapse by creating a sturdy structure during the initial high heat, then properly cooking through at the lower temperature.
- → Can I make the batter ahead of time?
It's best to use the batter immediately after mixing for maximum rise. If necessary, you can refrigerate it for up to an hour, but let it come back to room temperature and re-whisk briefly before baking for best results.
- → What's the difference between popovers and Yorkshire pudding?
Popovers and Yorkshire pudding use essentially the same batter. The main difference is that Yorkshire pudding is traditionally baked in the drippings from roasted meat, while popovers are baked in a buttered pan. This gives Yorkshire pudding a savory flavor profile, while popovers tend to be more neutral.
- → Can I add flavors to my popovers?
Absolutely! You can add herbs like thyme or rosemary, grated cheese like Gruyère or cheddar, or even sweet variations with cinnamon and sugar. Just fold these additions in gently after the batter is fully mixed to maintain the airy texture.