
 Pin it
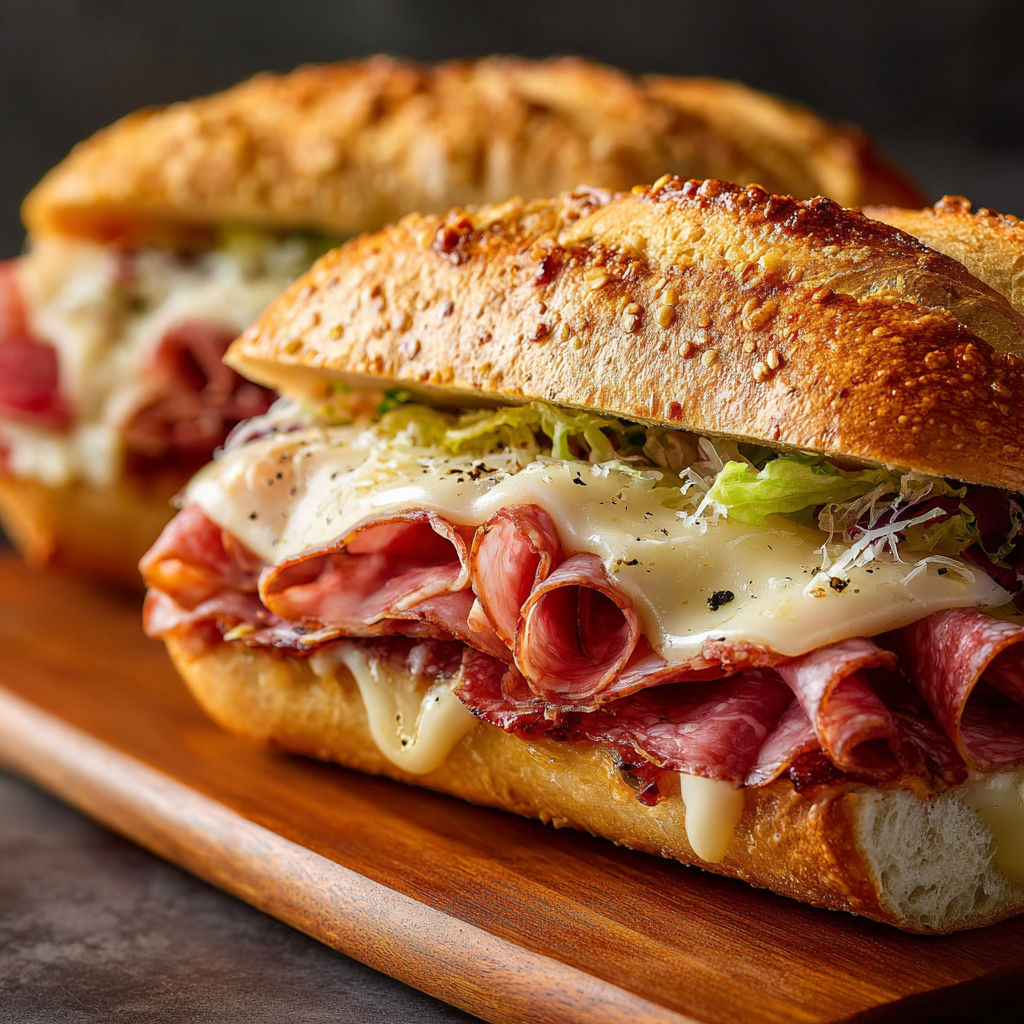
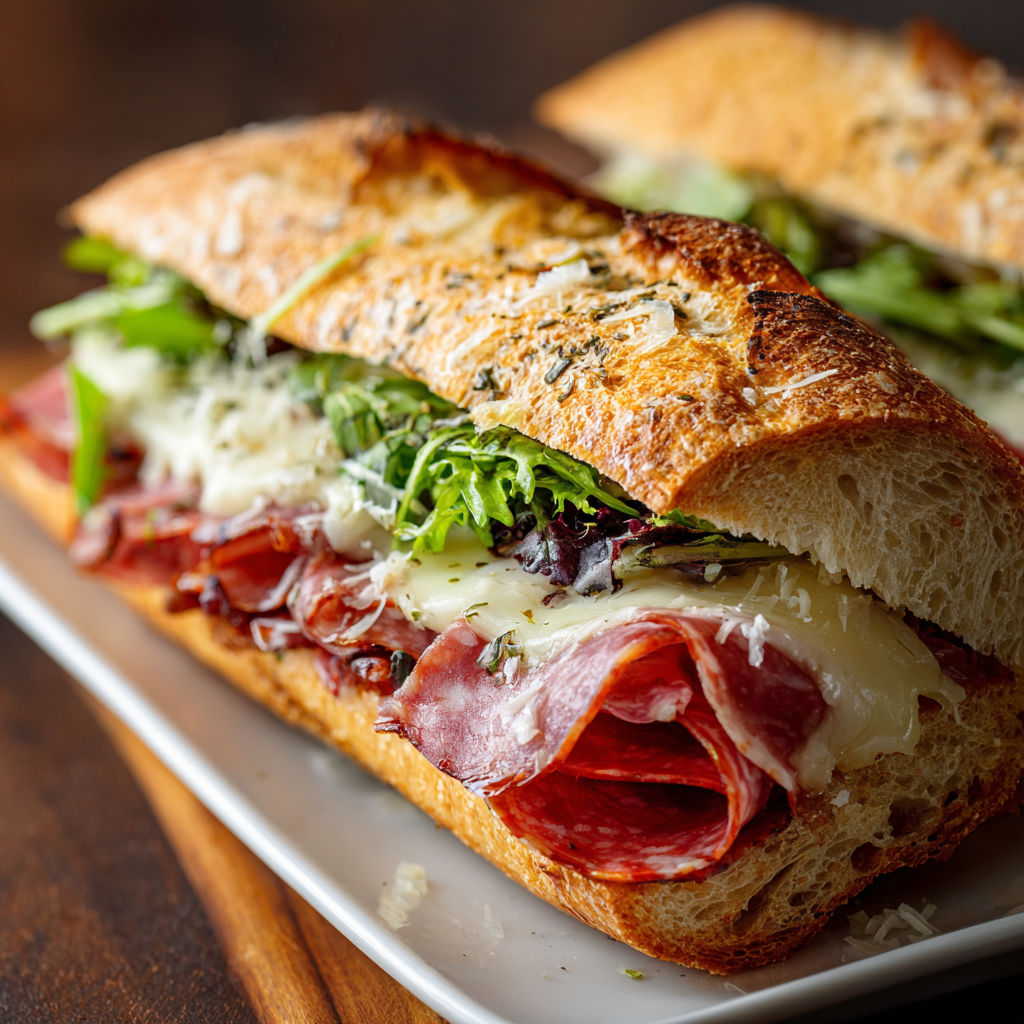
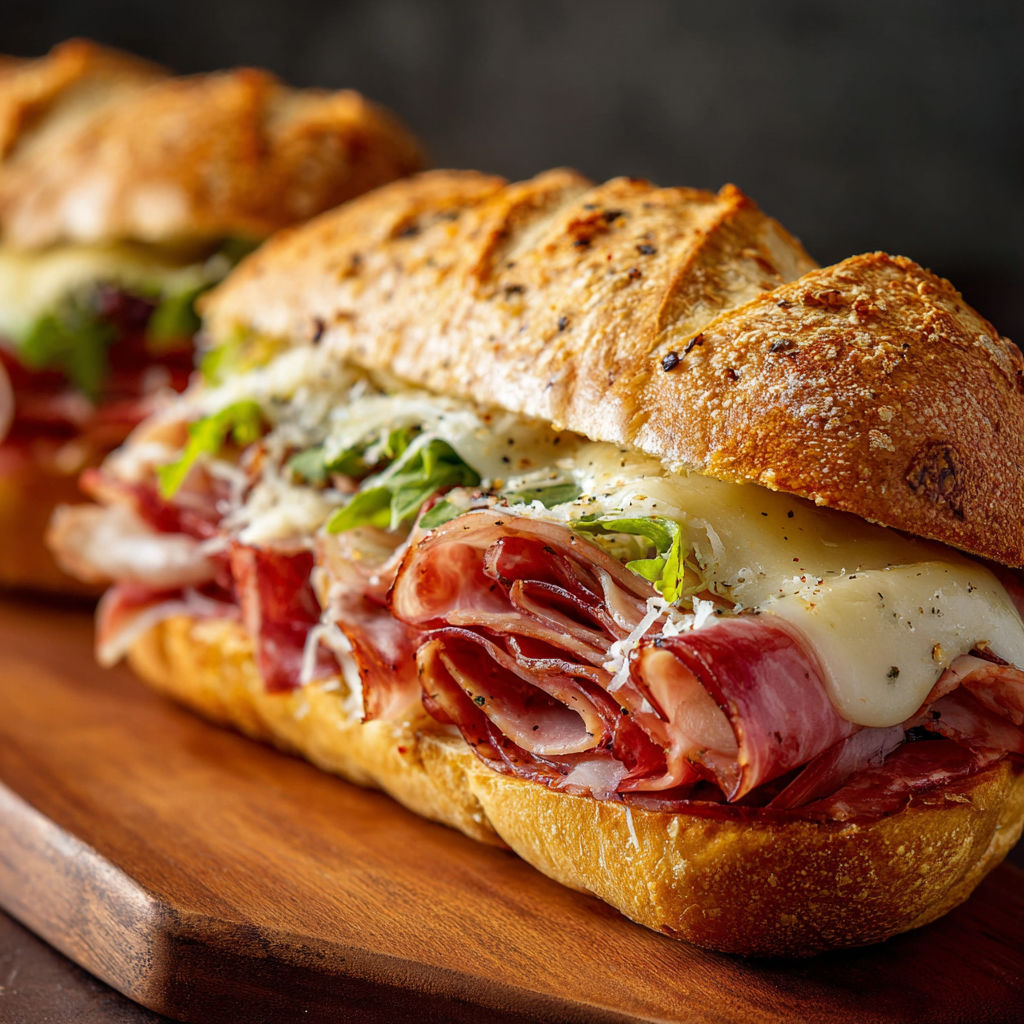
Nothing beats the ultimate comfort of a baked Italian sub sandwich oozing with cheese and packed with layers of deli meats and tangy peppers. These hot subs are your answer for quick dinners, game day gatherings, or anytime you need a crave-worthy meal that feels like a treat but comes together with hardly any fuss.
I first pulled these together for a Friday movie night and now my friends always ask when I am making baked subs again. The aroma alone gets everyone to the kitchen in a hurry.
Ingredients
- Hoagie rolls: Soft yet sturdy rolls keep all the fillings in place. Look for fresh rolls with a slightly crisp crust.
- Deli ham: Brings smoky savory flavor. Choose a good-quality ham from the service counter.
- Salami: Adds a spicy salty bite. Genoa salami works beautifully here.
- Roast beef or cooked ground beef: Roast beef gives a rich meaty taste while ground beef is a budget-friendly option.
- Sliced pepperoni: Optional for an extra layer of bold flavor and crisp edges.
- Provolone or mozzarella cheese: Melts perfectly for that classic Italian sub stretch. Try fresh mozzarella if you want extra creaminess.
- Pickled banana peppers or pepperoncini: Offer a tangy kick that keeps each bite vibrant. Go for brands packed in brine for the best flavor.
- Sautéed onions: Optional but they add mellow sweetness. Gently cook in olive oil until golden for best results.
- Italian seasoning: A dried herb mix is essential here and lifts the flavor of the sandwich top.
- Melted butter: Brush on the rolls for a golden finish and a bit of richness.
Instructions
- Prepare the Rolls:
- Open the hoagie rolls along the hinge but do not cut all the way through. This keeps your sandwich intact and full.
- Layer the Meats:
- Arrange slices of ham salami and roast beef inside each roll. If using pepperoni tuck it evenly among the other meats for every bite to have a little bit of everything.
- Add the Cheese and Veggies:
- Lay provolone or mozzarella slices across the meats. Add banana peppers and sautéed onions on top pressing lightly so they settle in and do not fall out during baking.
- Assemble and Season:
- Gently close the rolls and set them on a parchment-lined baking sheet. Pour the melted butter over the tops spreading to the edges for even coverage. Sprinkle Italian seasoning across the tops for extra flavor and aroma.
- Bake Covered:
- Cover the subs loosely with foil and place in a preheated oven at 375 F. Bake for about 12 minutes. The steam helps melt the cheese and warms everything through.
- Finish Uncovered:
- Remove the foil and bake for 3 minutes uncovered. This step is what crisps the tops and gives the bread a touch of golden crunch that makes every bite so satisfying.
- Serve Hot:
- Use a spatula to lift each sub from the baking sheet. Enjoy hot while the cheese is melted and gooey.
The banana peppers are always my favorite part. That tang cuts through the richness of the meat and cheese and brightens the whole sandwich. My son and I once spent a snowy afternoon coming up with our own combo and now it is a hidden tradition in our house.
Storage Tips
Store leftover subs tightly wrapped in foil in the refrigerator for up to 3 days. To reheat bake in a low oven wrapped loosely in foil until warmed through. For best texture avoid microwaving as it can make the bread soggy.
Ingredient Substitutions
If you do not have roast beef try turkey or cooked chicken breast instead. For the cheese swap in Swiss or cheddar for a fun twist. No banana peppers Use mild pickled jalapenos or even thin-sliced fresh bell pepper.
Serving Suggestions
These baked subs pair well with salty potato chips crunchy pickles or a bright vinaigrette salad. For a heartier meal add a bowl of tomato soup or serve with a side of crispy roasted potatoes.
Cultural and Historical Context
The Italian sub originated in Italian American communities in the Northeast as a way to combine favorite deli cuts and cheeses in an easy to eat meal. Baking the sandwich turns it from a simple lunch to a cozy hot dinner.
Seasonal Adaptations
Swap sautéed onions for thinly sliced fresh tomatoes in summer. Use roasted red peppers when in season for a sweeter flavor profile. Add a handful of arugula after baking for a peppery bite and fresh color.
Success Stories
Many readers have shared that these sandwiches are always the first to disappear at family gatherings. One friend even turned the recipe into mini baked sliders for a Super Bowl party. The gooey cheese and crisp Italian bread bring everyone back for seconds.
Freezer Meal Conversion
To make ahead assemble the subs through the seasoning step. Wrap each one in foil and freeze. To cook thaw overnight in the fridge then bake as directed adding an extra five minutes if needed to heat through.
These baked Italian subs are a family favorite and easy way to bring everyone together. Make them your own and enjoy every melty bite.
Recipe FAQs
- → Can I use different breads for the subs?
Yes, you can swap hoagie rolls with baguettes or ciabatta for extra crunch or a chewier texture.
- → What cheese melts best in these sandwiches?
Provolone and mozzarella melt beautifully, giving a creamy, stretchy texture. Try cheddar for a sharper taste.
- → Are the onions required?
Onions are optional but add great flavor and sweetness when sautéed. Feel free to skip or substitute with bell peppers.
- → Can I make vegetarian subs using this method?
Absolutely! Load up on roasted veggies, mushrooms, and your favorite cheese for a meatless option.
- → How do I store leftovers?
Keep any extras wrapped in foil and store in the refrigerator. Reheat in the oven for best texture.
- → What sides pair well with these baked subs?
Serve with potato chips, olives, crunchy pickles, or a fresh green salad for a satisfying meal.