
 Pin it
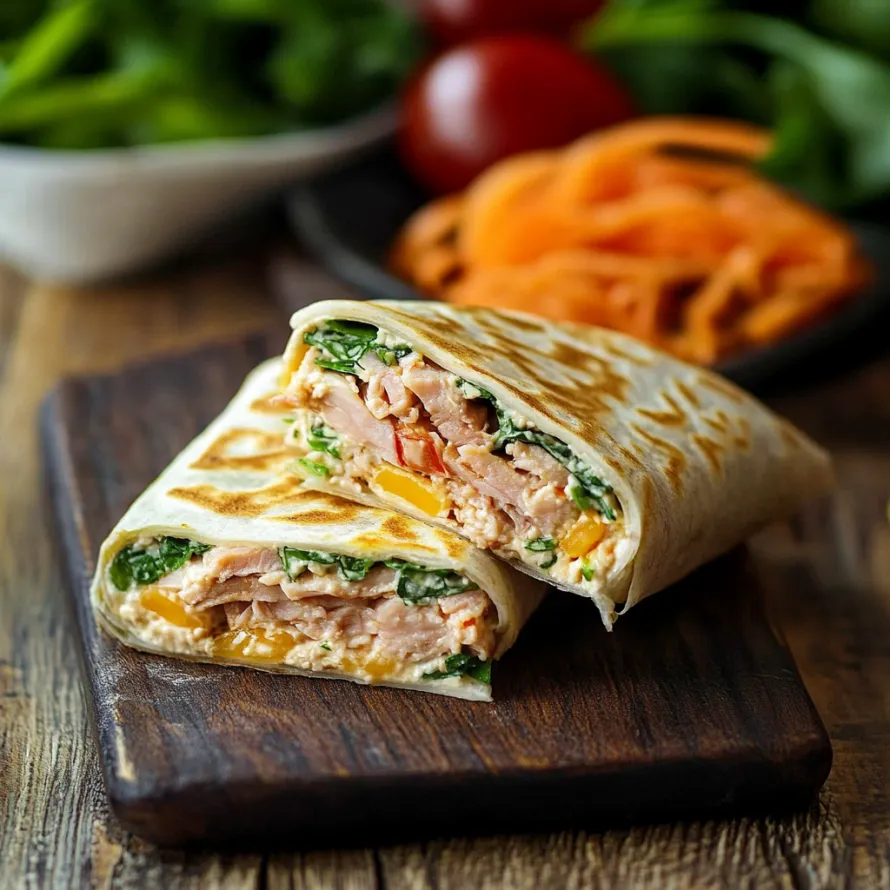
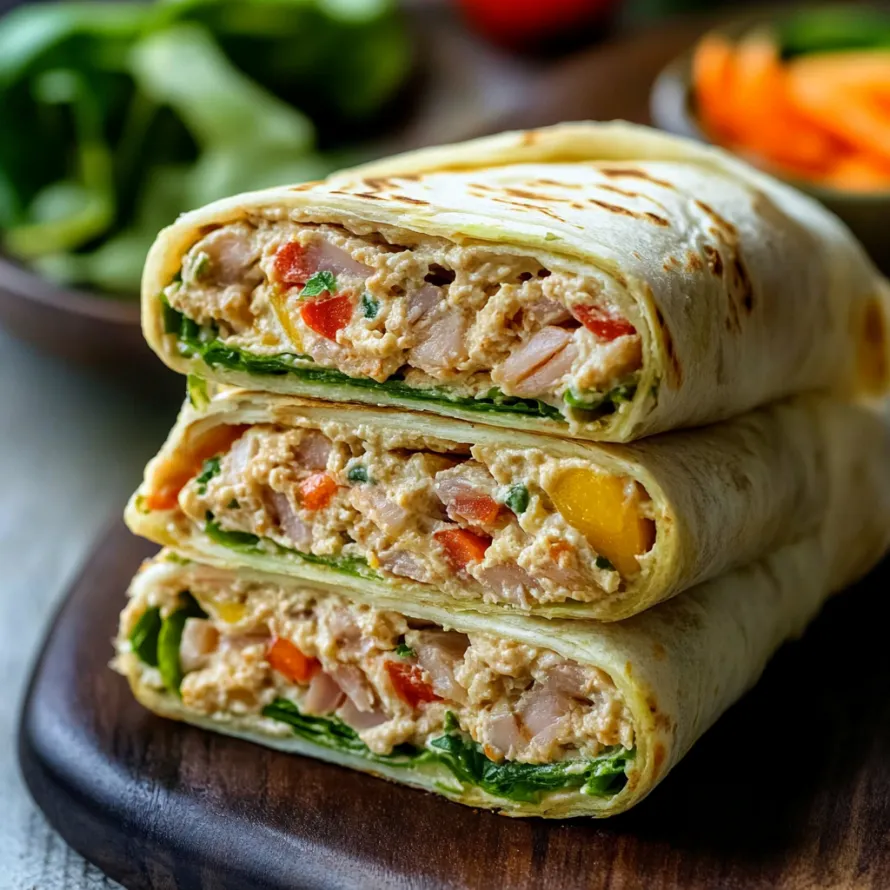
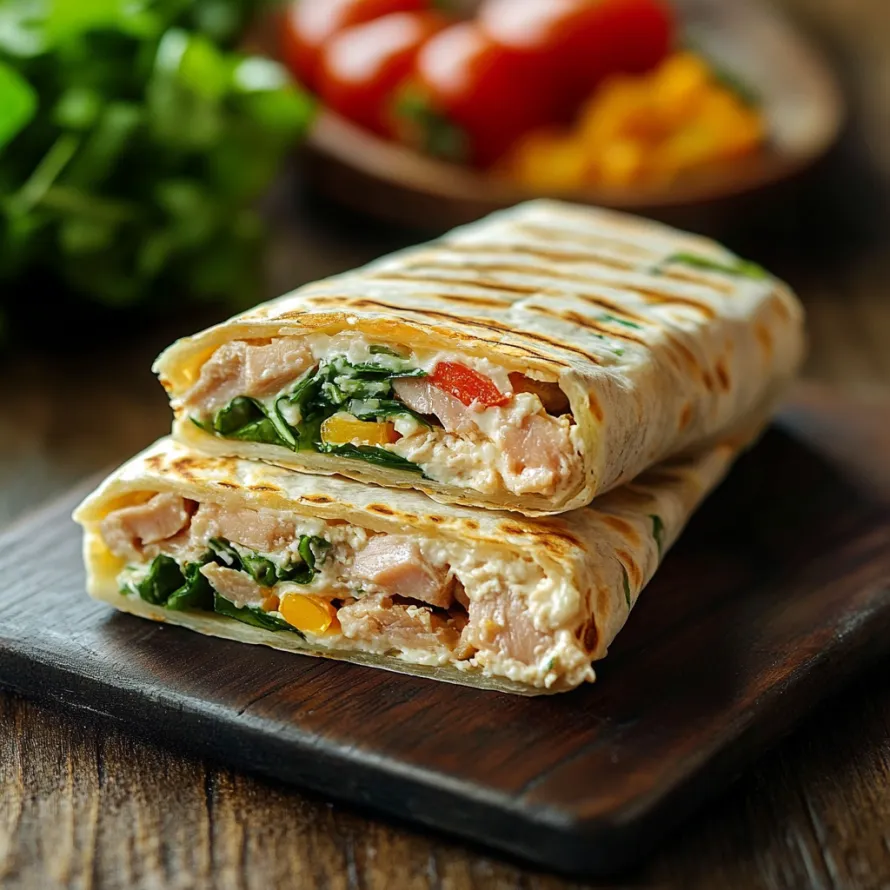
A tuna melt wrap combines the timeless appeal of melted cheese with flaky tuna for a satisfying meal that comes together in minutes. The tortilla gets perfectly crisp on the outside while protecting the gooey, cheesy filling within. This versatile recipe works equally well for a quick weeknight dinner or packed lunch that stays delicious even hours later.
I started making these tuna melts when looking for alternatives to basic sandwiches. The tortilla keeps everything contained much better than bread, and the grilled exterior adds a wonderful textural contrast. Even people who normally turn down canned tuna often request these wraps once they try them.
Tuna Salad Components
- Canned tuna: Provides lean protein with mild flavor that pairs perfectly with the other ingredients.
- Mayonnaise: Creates the creamy base that brings everything together while adding richness.
- Chopped pickles: Add brightness and acidity that balances the richness of cheese and mayo.
- Dijon mustard: Contributes tangy depth that elevates the flavor profile beyond basic tuna salad.
- Diced onion: Delivers sharp flavor notes and subtle crunch throughout each bite.
- Chopped celery: Introduces refreshing crispness and subtle flavor that complements the tuna.
- Salt and pepper: Enhance all the flavors while allowing you to adjust seasoning to your taste.
- Large flour tortillas: Create the perfect flexible vessel that crisps beautifully when grilled.
- Shredded cheese: Melts into gooey perfection that binds everything together.
Wrap Creation Process
- Flavorful Foundation Building:
- Drain your canned tuna thoroughly by pressing against the lid in the sink until all excess liquid releases. Transfer the drained tuna to a medium mixing bowl and flake with a fork to break up any large chunks. Add mayonnaise and mustard to the bowl, stirring until tuna is evenly coated with creaminess. Incorporate the finely chopped pickles, onion, and celery, distributing them throughout the mixture. Season with freshly ground black pepper and just enough salt to enhance flavors without overwhelming the natural saltiness of the tuna. Taste and adjust seasonings until the balance feels perfect.
- Strategic Assembly:
- Place a large flour tortilla on a clean, flat work surface. Sprinkle shredded cheese evenly across half of the tortilla surface, creating a base layer that will melt and help seal the wrap. Spread half of the prepared tuna salad mixture over the cheese, keeping it centered rather than spreading too close to the edges. Leave approximately half an inch of border around the edges to prevent filling from escaping during cooking. The placement of cheese both under and over the tuna creates the perfect melty environment that holds everything together.
- Perfect Folding Technique:
- With the filled tortilla positioned horizontally before you, gently fold the left and right sides inward about an inch to help contain the filling. Starting with the bottom edge closest to you, lift and fold it over the filling while using your fingers to keep the sides tucked in. Continue rolling forward, maintaining firm but gentle pressure to create a compact cylinder. The finished wrap should feel secure with the seam positioned firmly underneath, ready for grilling.
- Crispy Transformation:
- Heat a heavy non-stick skillet over medium-low heat until warm but not smoking. Add butter or olive oil and allow it to melt and coat the surface evenly. Place the assembled wrap seam-side down in the pan, allowing the weight of the filling to naturally seal the edge. Press down gently with a spatula to maximize contact with the cooking surface. Cook undisturbed for about three minutes until the bottom develops a golden, crispy exterior. Carefully flip using a wide spatula and repeat the process on the second side, cooking until cheese inside melts completely and the exterior reaches a satisfying crispness.
The combination of pickles and mustard makes this wrap special for me. The tanginess cuts through the richness perfectly while adding complexity to what could otherwise be a simple sandwich. My husband particularly enjoys when I add a sprinkle of hot pepper flakes to the tuna mixture for gentle heat throughout. Even our teenagers, who usually avoid canned fish, request these wraps regularly.
Complete Meal Planning
This versatile wrap pairs beautifully with a variety of sides to create a complete meal experience. For lighter accompaniments, consider a simple green salad dressed with lemon vinaigrette that complements without competing with the rich wrap. Tomato soup makes the perfect traditional pairing that enhances the grilled cheese aspect of this dish. During warmer months, cucumber slices with a sprinkle of salt provide refreshing contrast to the warm, crispy wrap. The entire meal comes together quickly regardless of which side you choose, making this perfect for busy weeknights when time feels limited.
Creative Adaptations
The basic formula welcomes numerous adaptations to suit different tastes and dietary needs. Mediterranean enthusiasts might incorporate chopped olives and sun-dried tomatoes into the tuna mixture. Those seeking additional vegetables could add baby spinach or arugula before rolling. Spice lovers might include diced jalapeños or a dash of hot sauce mixed into the tuna salad. Health-conscious individuals could use Greek yogurt in place of mayonnaise and whole grain tortillas for additional fiber. Pescatarians looking for variety might substitute canned salmon for equally delicious results.
Practical Storage Solutions
Proper storage techniques maintain quality remarkably well for future meals. Refrigerate assembled but uncooked wraps wrapped individually in parchment paper for optimal freshness up to three days. For longer storage, wrap individually in aluminum foil before placing in freezer-safe containers. Label each package with contents and date for easy identification. Thaw frozen wraps overnight in the refrigerator before grilling for best texture results. Already grilled wraps can be reheated in a dry skillet over medium heat for about two minutes per side to restore crispness without drying out the filling.
I find something deeply satisfying about transforming simple pantry ingredients into a meal that feels special. The tuna melt wrap has become my reliable solution for those days when cooking feels overwhelming but takeout seems unnecessary. The combination of protein-rich tuna with melted cheese creates perfect comfort food balance while the crispy grilled exterior elevates the experience beyond basic sandwiches. This recipe reminds me that good food doesn't require complicated techniques or exotic ingredients when simple elements are combined thoughtfully.
Recipe FAQs
- → Can I make this tuna melt wrap ahead of time?
- Yes! You can prepare the tuna salad mixture up to 3 days ahead and store it in the fridge. When ready to eat, simply assemble and cook the wrap for a quick meal.
- → What's the best cheese to use for a tuna melt wrap?
- American and cheddar cheese work great because they melt beautifully, but feel free to use any cheese that melts well, like Swiss, pepper jack, or provolone.
- → Can I make this wrap without a pan?
- While cooking gives the wrap its signature crispy exterior, you can use a sandwich press, panini maker, or even a toaster oven to heat it up until the cheese melts.
- → How can I make this tuna melt wrap gluten-free?
- Simply substitute the regular flour tortilla with a gluten-free wrap or tortilla of your choice to make this recipe gluten-free.
- → What can I add to the tuna salad for extra flavor?
- Try adding diced pickles, capers, fresh herbs like dill or parsley, a squeeze of lemon juice, or a dash of hot sauce to customize your tuna salad.