
 Pin it
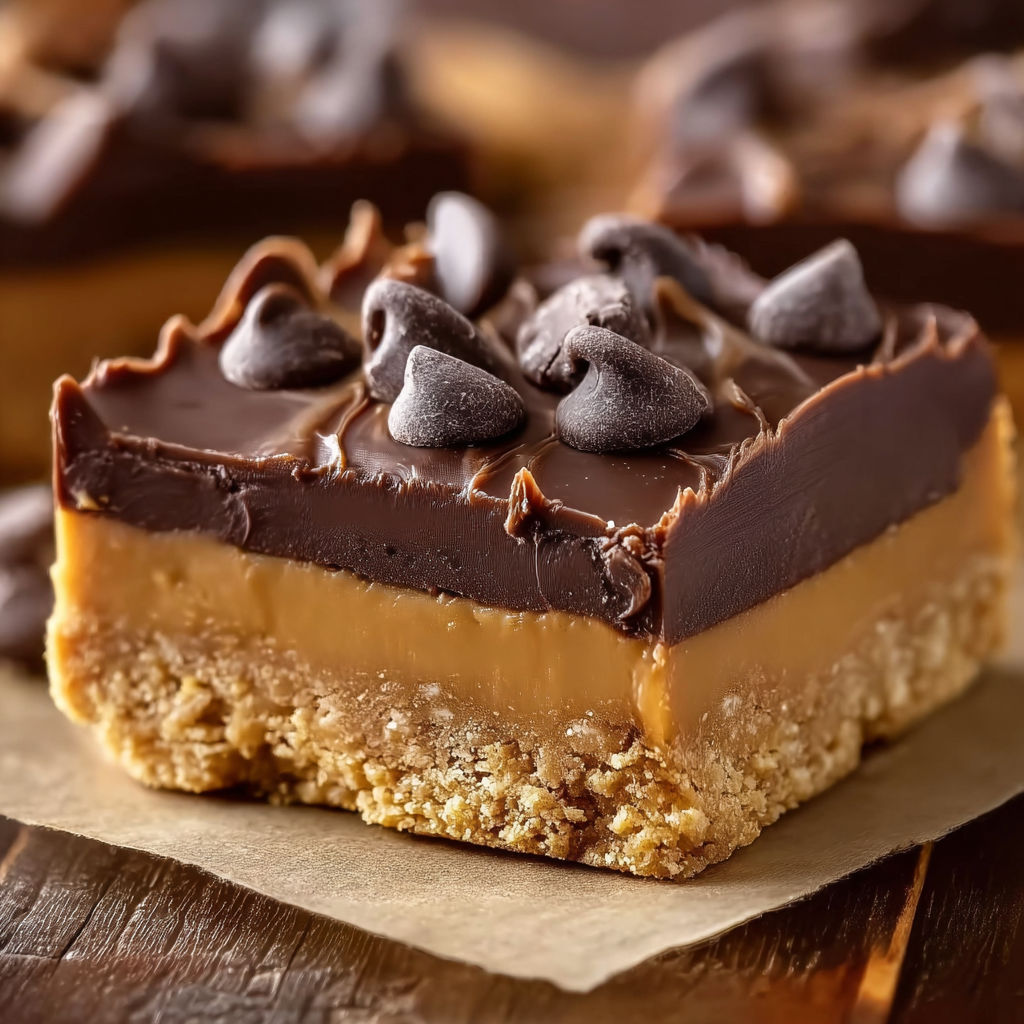
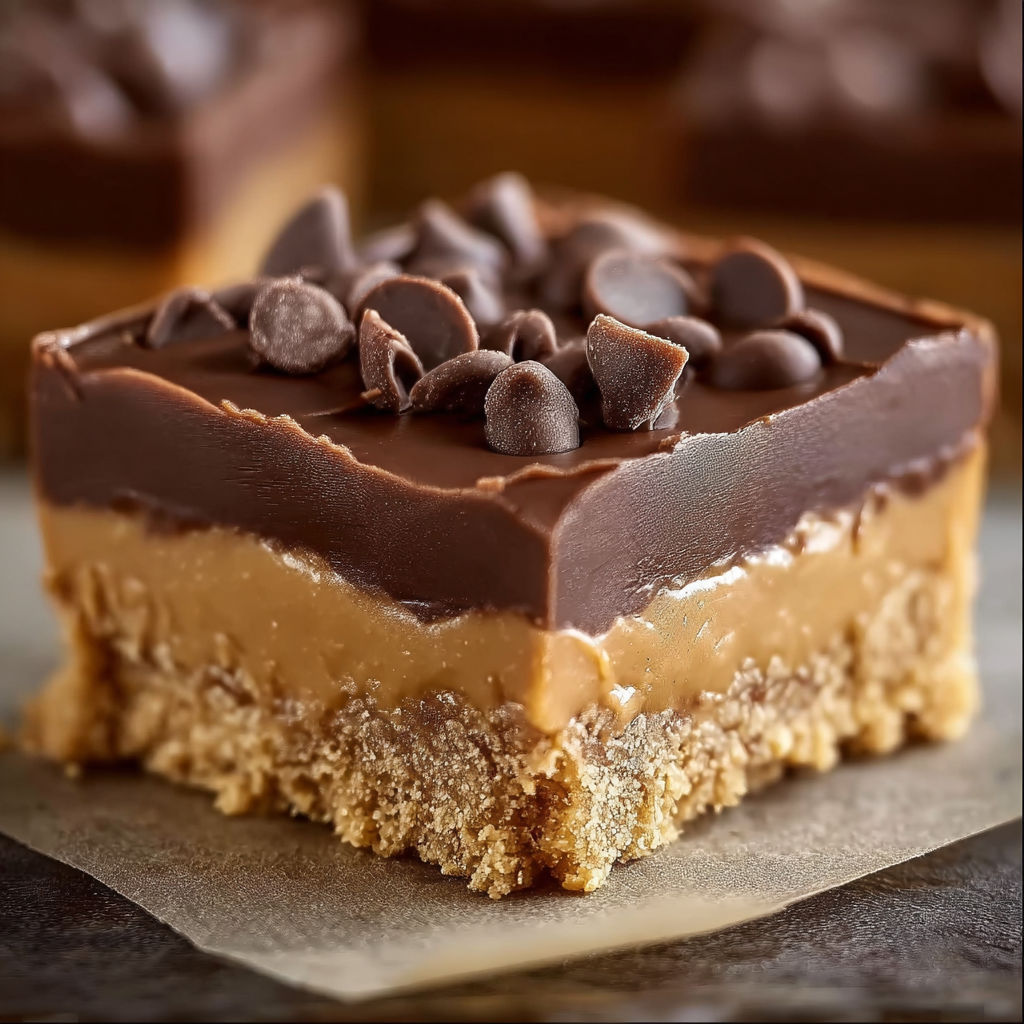
If you crave the classic combination of chocolate and peanut butter but do not want to turn on the oven these Reese&s Peanut Butter No-Bake Bars are an absolute game changer The taste brings back sweet childhood memories of trading Halloween peanut butter cups with my brothers and the texture is perfectly rich and fudgy with almost no effort at all These bars are ideal for after-school snacks or simple parties when you want something indulgent and quick
I first whipped up these bars for a last minute birthday treat and my friends now beg for the recipe every time we have a gathering
Ingredients
- Unsalted butter: makes the base creamy and helps hold the bars together always use fresh for best taste
- Graham cracker crumbs: add that subtle toasty crunch use honey graham for extra flavor
- Powdered sugar: sweetens and binds the base sift for the silkiest texture
- Creamy peanut butter: gives richness and the signature flavor choose a brand with minimal added oil for best results
- Semi-sweet chocolate chips: melt smoothly and balance the sweetness try to pick quality chocolate when possible
- Additional creamy peanut butter: gives the chocolate topping extra silkiness and helps prevent cracking
Instructions
- Prepare the Base:
- In a large mixing bowl combine the melted butter graham cracker crumbs powdered sugar and peanut butter Stir thoroughly until the mixture is even smooth and you see no dry spots It should feel quite thick but easily malleable
- Press into the Pan:
- Line a 9x13 inch baking dish with parchment paper ensuring it covers the sides for easy lifting Use your hands or the back of a spoon to press the peanut butter mixture firmly and evenly into the dish Focus on creating a smooth compact layer that reaches every edge
- Melt Chocolate Topping:
- Place chocolate chips and the remaining peanut butter in a microwave safe bowl Heat in short 20 second bursts stirring after each session Continue until the chocolate is completely melted smooth and glossy This gentle approach avoids scorching
- Top and Chill:
- Pour the melted chocolate over the peanut butter base and spread with a spatula for a glossy even layer Gently shake the pan side to side to level the chocolate Refrigerate the dish uncovered for one to two hours until the chocolate topping is set and the base is firm
- Slice and Serve:
- Lift the bars out by the parchment paper and place on a large cutting board Use a large sharp knife for clean slices Wipe the blade between cuts for sharp edges Arrange the bars on a platter and serve chilled or at room temperature for softer bites
My favorite part is swirling the warm melted chocolate with the extra peanut butter on top Sometimes the family gathers to argue about who gets to lick the spatula The whole house smells like cocoa and peanuts
Storage Tips
Keep these bars in an airtight container chilled for maximum freshness They stay perfect for up to seven days in the refrigerator For longer keeping place slices between waxed paper and freeze them The texture stays true even after thawing which is rare for many desserts
Ingredient Substitutions
Swap graham cracker crumbs for crushed pretzels for a salty crunch or try digestive biscuits if those are easier to find Natural peanut butter can work just give it a good stir before measuring If dairy is an issue use plant based butter and dairy free chocolate chips with great results
Serving Suggestions
Cut the bars into small squares for parties or make generous rectangles for lunchbox treats Drizzle melted white chocolate over the set topping for a festive look I sometimes top with a sprinkle of flaky salt for grown up flavor
Cultural and Holiday Traditions
No bake desserts like these are a staple for American potlucks and picnics Often they appear at summer reunions because nobody wants an oven on in July My grandmother used to wrap bars in wax paper for holiday gift baskets and they were always the first to go
Seasonal Adaptations
Swap in almond butter for a toasty fall update
Press chopped toasted peanuts into the top layer for crunch
Use white chocolate for a spring or Easter themed tray
Success Stories
I once brought a big tray to my kids school bake sale and they vanished before the next class bell Moms and kids kept coming up for the recipe A friend who had never baked anything before made these and now they are her signature
Freezer Meal Conversion
Cut bars after chilling and place them in a single layer separated by wax paper in a freezer safe container Pull out a slice any time the chocolate peanut butter craving hits and let it thaw for just a few minutes

These bars always deliver on flavor and nostalgia Enjoy a slice for yourself—no baking required.
Recipe FAQs
- → Can I use crunchy peanut butter?
Yes, crunchy peanut butter adds extra texture, but creamy will create a smoother base layer.
- → How long do the bars need to chill?
Refrigerate for 1-2 hours, or until the chocolate topping is firm and set for easy slicing.
- → Can I substitute graham cracker crumbs?
Yes, try crushed digestive biscuits or vanilla wafers for a similar effect if preferred.
- → How should I store these bars?
Keep them in an airtight container in the refrigerator for up to one week for best freshness.
- → Can I freeze the bars?
Yes, wrap tightly and freeze for up to three months. Thaw in the fridge before enjoying.