
 Pin it
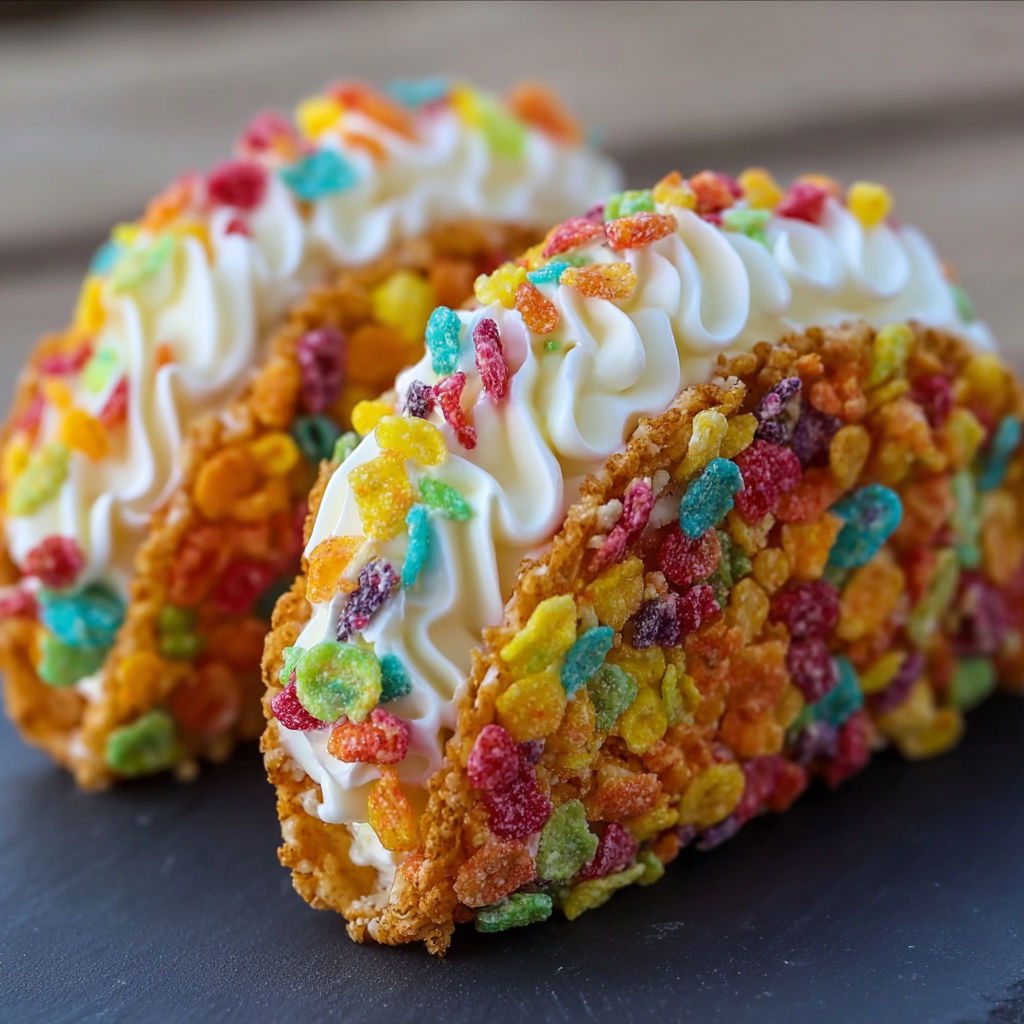
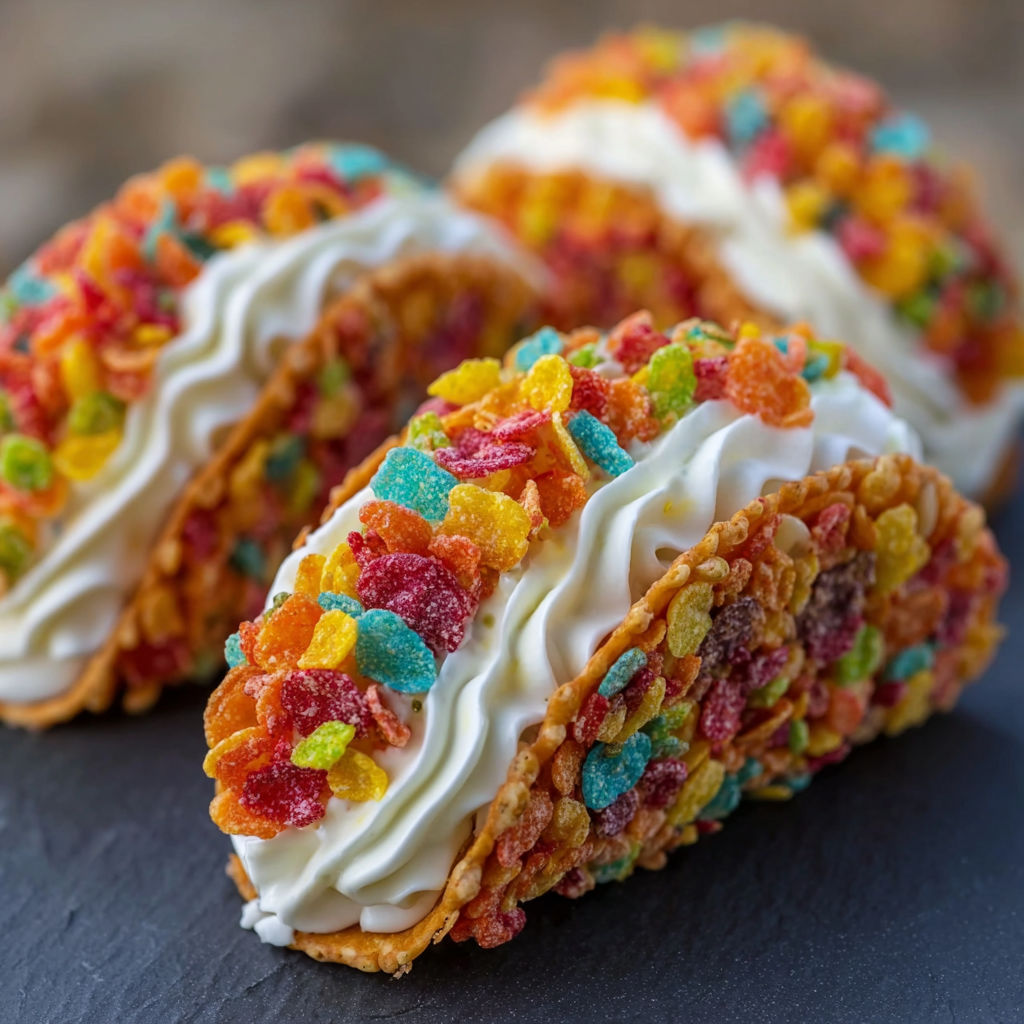
Cheesecake tacos made with Fruity Pebbles cereal combine the nostalgic flair of your favorite childhood breakfast with a modern dessert twist. These colorful creamy treats always remind me of sleepovers with cousins when the most important thing was which cereal we got to pick for breakfast the next day.
The first time I brought these to a potluck the whole tray disappeared in minutes with both kids and adults asking for seconds. I love that such a playful idea always gets people talking and smiling.
Ingredients
- Fruity cereal like Fruity Pebbles: adds crunch color and a fun fruity flavor plus it holds together well when mixed with butter
- Unsalted butter: binds the cereal together to form crisp taco shells choose high quality butter for best flavor
- Cream cheese: forms the creamy tangy base of the cheesecake choose full fat for richer texture
- Powdered sugar: sweetens the filling while keeping it ultra smooth sift for a lump free blend
- Pure vanilla extract: adds a warm aromatic note always use genuine vanilla for best results
- Whipped cream: lightens the texture and brings a soft airy mouthfeel freshly whipped works best but quality store bought is fine
- Extra fruity cereal for garnish: delivers more texture color and a playful finish to each taco
Instructions
- Combine the Fruity Magic:
- Mix your fruity cereal and melted butter in a large bowl. Stir carefully and thoroughly so every bit of cereal glistens with butter.
- Shape and Set the Taco Shells:
- Take the coated cereal and press it into small taco molds or muffin tins. Use the back of a spoon or your fingers to compact the mixture firmly so it holds together as it chills. Refrigerate for at least thirty minutes to firm up the shells.
- Whip the Cream Cheese:
- In a separate bowl beat the cream cheese on medium speed until it turns soft and fluffy. This step is key for the smoothest filling.
- Sweeten and Flavor the Filling:
- Gradually add the sifted powdered sugar and the vanilla extract to the cream cheese. Mix until everything blends into a silky smooth batter.
- Fold in the Whipped Cream:
- Gently add the whipped cream into the cheese mixture. Use a spatula and fold softly so the filling stays light and not dense. Avoid overmixing for the airiest result.
- Fill the Taco Shells:
- Once your cereal shells are set fill each one with a generous spoonful of the cheesecake mixture. Try to fill right to the edges for a tempting look.
- Garnish and Serve:
- Sprinkle more fruity cereal over the filled tacos for that extra burst of crunch and color. Serve right away if you like a softer filling or chill again for a firmer bite.

I find that using full fat cream cheese always creates the richest smoothest filling. My favorite part is letting the kids help fill and decorate the tacos which makes for hilarious memories and lots of sticky fingers.
Storage and Make Ahead Tips
These cheesecake tacos keep nicely in the fridge for up to two days. If you want to maintain the crunch of the cereal shells store the shells and the filling separately and assemble just before serving. The assembled tacos can be placed in a single layer covered with plastic wrap and kept chilled.
Cereal Choices and Ingredient Swaps
While Fruity Pebbles make these extra colorful you can easily swap in other crispy cereals like Cocoa Pebbles or Trix for a different twist. For dairy free diets use a whipped coconut cream and a plant based cream cheese. Powdered monk fruit sweetener can be substituted in for sugar if you are making them lower in sugar.
Serving Inspirations
For parties display the tacos in rows on a tray and let everyone grab their favorite. You can sprinkle extra toppings such as mini chocolate chips or rainbow sprinkles for more fun. Serve with a drizzle of white chocolate for an extra touch.
Cultural Context
Turning classic childhood cereals into modern desserts taps into a trend where familiar flavors meet creative new forms. This recipe is a playful nod to both Mexican dessert tacos and iconic American breakfast cereals making it as joyful to serve as it is to eat.
Seasonal Adaptations
Use Halloween themed cereal for a spooky version. Decorate with pastel sprinkles in spring for an Easter treat. Swap in peppermint candies during winter holidays for a festive surprise.
Success Stories
Friends of mine have used this recipe for birthday dessert tables and even breakfast for dinner nights with rave reviews. It is always a hit at potlucks because the tacos are both eye catching and easy to eat by hand.
Freezer Meal Conversion
While these tacos are best enjoyed fresh you can prepare the taco shells ahead and freeze them. Just thaw at room temperature before filling for the best texture. Avoid freezing with filling as it can become icy when thawed.
These vibrant cheesecake tacos always bring a smile and are a memorable conversation starter. Try experimenting with cereals and toppings for new occasions.
Recipe FAQs
- → How do you make the cereal shells hold their shape?
Press the fruity cereal and melted butter firmly into molds, then chill to set for at least 30 minutes. This ensures the shells are sturdy enough to hold the filling.
- → Can I substitute the whipped cream?
Yes, you can use store-bought whipped topping or homemade whipped cream. For a lighter option, try Greek yogurt.
- → What is the best way to serve these tacos?
Serve chilled for a firm texture or immediately for a softer, creamier bite. Add extra cereal as garnish before serving.
- → Can I prepare these ahead of time?
The cereal shells and filling can both be made in advance. Assemble and fill the shells just before serving to maintain crunchiness.
- → How do I store leftovers?
Keep leftovers in an airtight container in the refrigerator. Enjoy within a day, as the shells may soften over time.