
 Pin it
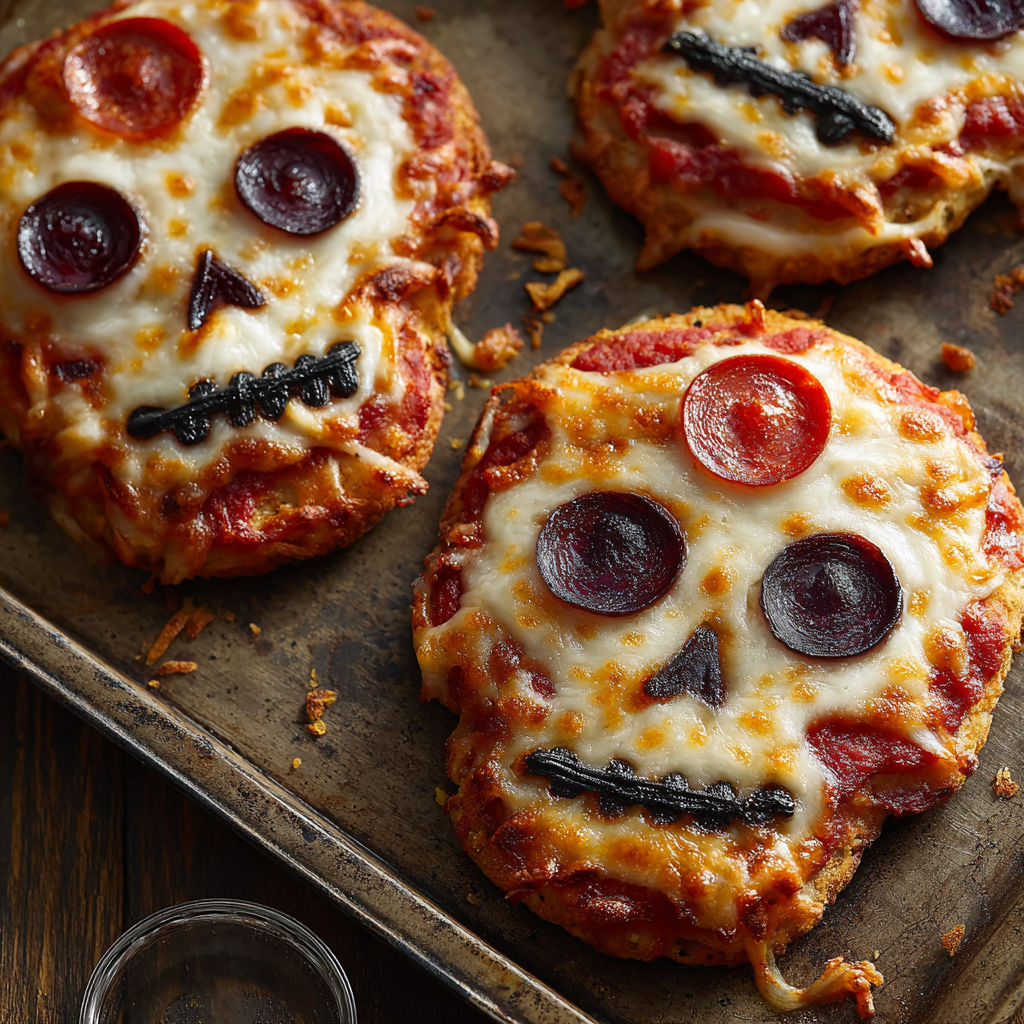
Nothing makes October more festive than biting into cheesy pizza skulls fresh from the oven. These handheld Halloween treats have become a staple at my family parties because they are equal parts spooky and delicious. Simple pantry ingredients transform into a playful twist on pizza that gets everyone grinning. Whether you are baking for kids or just channeling your inner ghoul, these pizza skulls promise fun layered with gooey cheese and tangy tomato sauce in every bite.
I started making these when my youngest asked for a Halloween dinner instead of candy and they have been a highly requested treat every year since
Ingredients
- All purpose flour: gives body to the dough and yields a sturdy but tender crust Look for unbleached for best flavor
- Baking powder: ensures the skulls puff up light and airy Pick a fresh batch so your treats do not fall flat
- Salt: sharpens all the flavors in each bite Choose a fine grained salt so it mixes in evenly
- Garlic powder: delivers a subtle savory kick Opt for roasted garlic powder if you like warmth
- Italian seasoning: infuses the dough with herby notes Use an aromatic blend with oregano basil and thyme
- Water: brings the dough together Add it gradually until just right
- Shredded mozzarella cheese: melts into stretchy strings of goodness A whole milk version will give you that classic pull
- Pizza sauce: creates the signature zesty pizza taste Go for thick and rich so it does not leak out
- Sliced pepperoni or preferred topping: brings extra bite and flavor Try mini pepperoni or even chopped olives for variety
- Egg: for a glossy golden brown finish Crack it into a separate bowl and beat well before brushing
- Olive oil: keeps dough moist and adds a hint of fruitiness Choose extra virgin for best flavor
Instructions
- Prepare the Oven:
- Preheat your oven to 220 degrees Celsius and line a baking sheet with parchment paper The high heat will give your skulls a crisp golden crust and the paper prevents sticking
- Mix the Dry Ingredients:
- Combine all purpose flour baking powder salt garlic powder and Italian seasoning in a large mixing bowl Stir thoroughly so the leavening and seasonings are distributed evenly throughout the flour
- Form the Dough:
- Slowly pour in water as you stir the flour mixture together Add just enough so it comes together into a shaggy mass Transfer it to a floured surface and knead for several minutes pressing and folding until smooth and soft
- Roll and Cut Dough:
- Dust your work surface with more flour Roll dough out to about half a centimetre thick Too thick and it will not cook through too thin and it might tear Use a skull shaped cookie cutter to cut pairs of matching shapes Aim for an even number so every bottom has a top
- Assemble with Fillings:
- On half of your skulls take a spoonful of pizza sauce and spread it gently in the center Sprinkle with shredded mozzarella and arrange a few slices of pepperoni or your choice of toppings Be sure to leave room around the edges so they seal properly
- Top and Seal:
- Lay a plain dough skull on top of each filled one Press all the way around the edges with your fingers to seal firmly Then use the tines of a fork if you want to add a crimped edge for decoration and extra strength
- Add Egg Wash:
- Beat your egg in a small bowl and use a pastry brush to coat the tops of each skull lightly This will give that iconic bakery style golden sheen
- Bake:
- Transfer the assembled skulls to your prepared baking sheet Bake for twelve to fifteen minutes Rotate the pan if your oven has hot spots and watch closely near the end so you get just the right degree of golden brown
- Cool and Serve:
- Remove from the oven and let rest for a few minutes The filling will be piping hot so patience pays off Arrange on a platter and enjoy
At our last family Halloween movie night these skulls disappeared before the first spooky scene even rolled
Storage Tips
Let leftover pizza skulls cool completely then place in an airtight container They keep well in the refrigerator for up to three days To reheat pop them in a 180 degree oven for five to seven minutes so the dough stays crisp Microwaving works in a pinch but sometimes softens the crust
Ingredient Substitutions
For dairy free swaps use vegan cheese and brush with olive oil instead of egg Turkey pepperoni works just as well and you can experiment with cooked and crumbled sausage Thinly sliced mushrooms and spinach make a great vegetarian take
Serving Suggestions
Set out a platter of pizza skulls with extra sauce for dipping They make a spooky centerpiece for Halloween parties You can even garnish with black olive eyes or drizzle with a little pesto for a Frankenstein effect
Cultural and Historical Context
Transforming everyday foods into festive shapes is a long standing tradition in many cultures Halloween in particular inspires lots of playful creativity These pizza skulls play off that idea and bring a modern twist drawing inspiration from classic mini pies and hand held pastries loved worldwide
Seasonal Adaptations
Pumpkin puree can be added to the dough for a fall flavor boost Shredded chicken or cooked pumpkin cubes make the filling festive For Christmas try tree or star shapes with different fillings
Success Stories
I have gotten messages from readers who said these pizza skulls were the star of a classroom Halloween party Teachers and parents both appreciate that they are less messy than saucy pizza slices and the individual servings make them easy to enjoy
Freezer Meal Conversion
Once cooled freeze pizza skulls individually on a tray When solid transfer to a ziptop bag and store for up to two months Reheat directly from frozen at 180 degrees Celsius for ten to twelve minutes
Set aside some of these pizza skulls for your next scary movie night or a Halloween gathering They are always the first to vanish and guaranteed to make everyone smile
Recipe FAQs
- → How do I make the dough flavorful?
Mix garlic powder and Italian seasoning with the flour to infuse extra flavor for the dough base.
- → Can I use store-bought dough instead?
Yes, pre-made pizza dough can be substituted for convenience while still achieving delicious results.
- → What fillings can I use besides pepperoni?
Use vegetables, cooked sausage, or any favorite pizza topping for a personalized flavor combination.
- → How do I prevent the skulls from opening while baking?
Seal edges firmly and crimp with a fork to lock in the filling and maintain the skull shape during baking.
- → Can these pizza skulls be made ahead?
Yes, assemble and refrigerate unbaked skulls, then bake fresh before serving for best texture.