
 Pin it
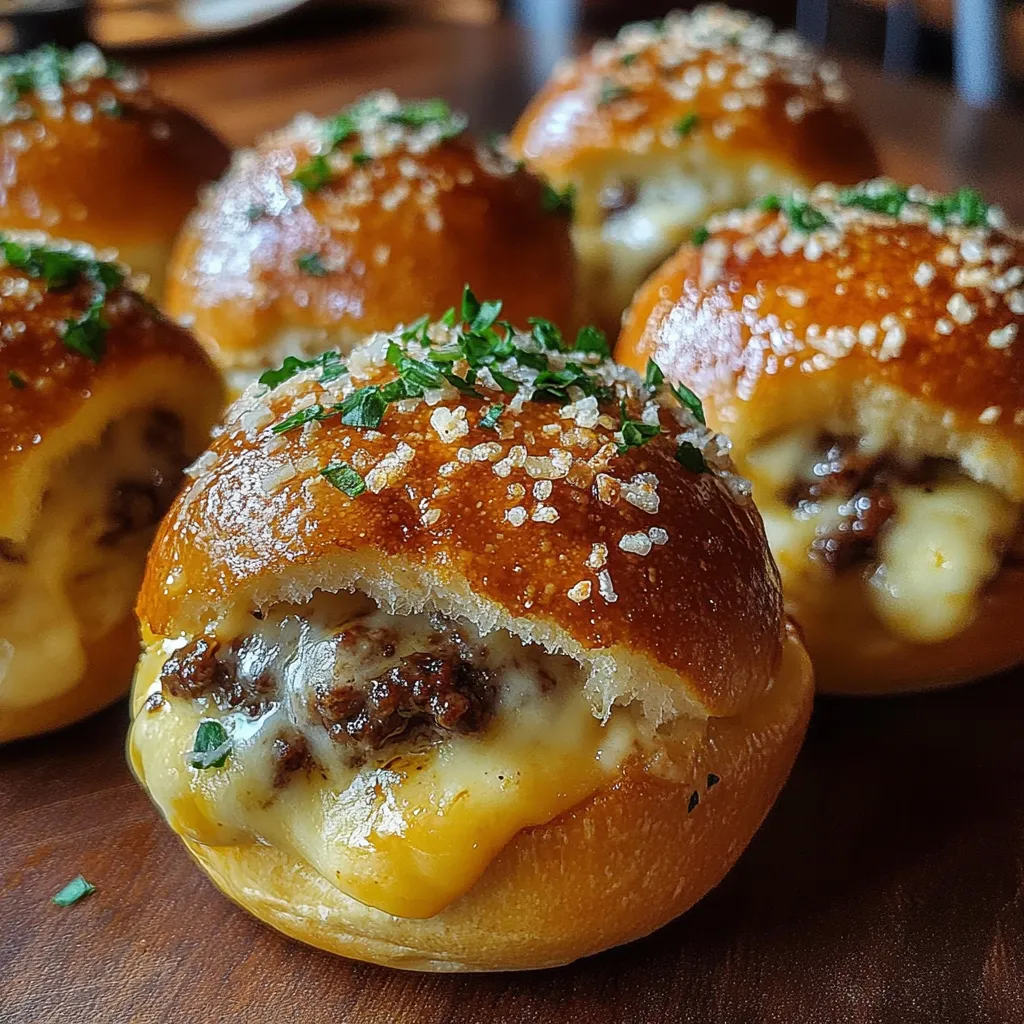
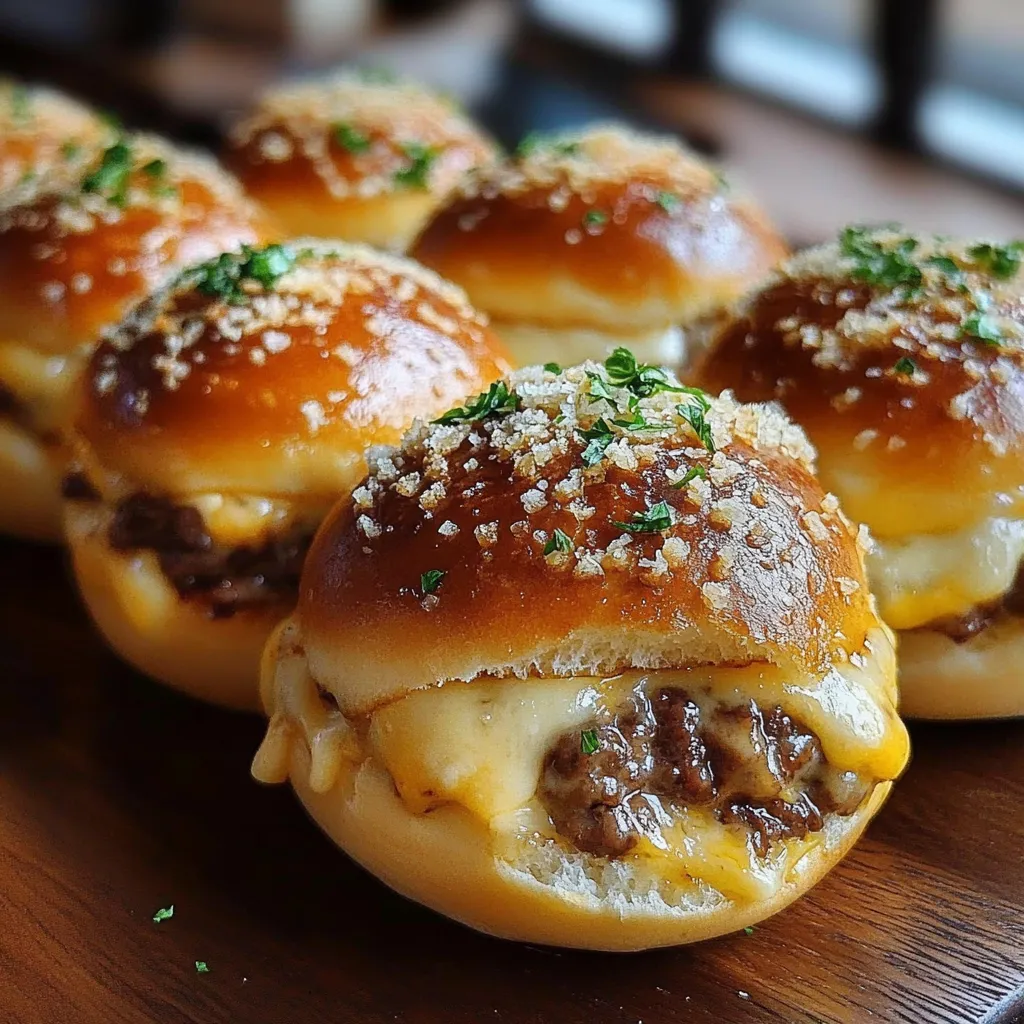
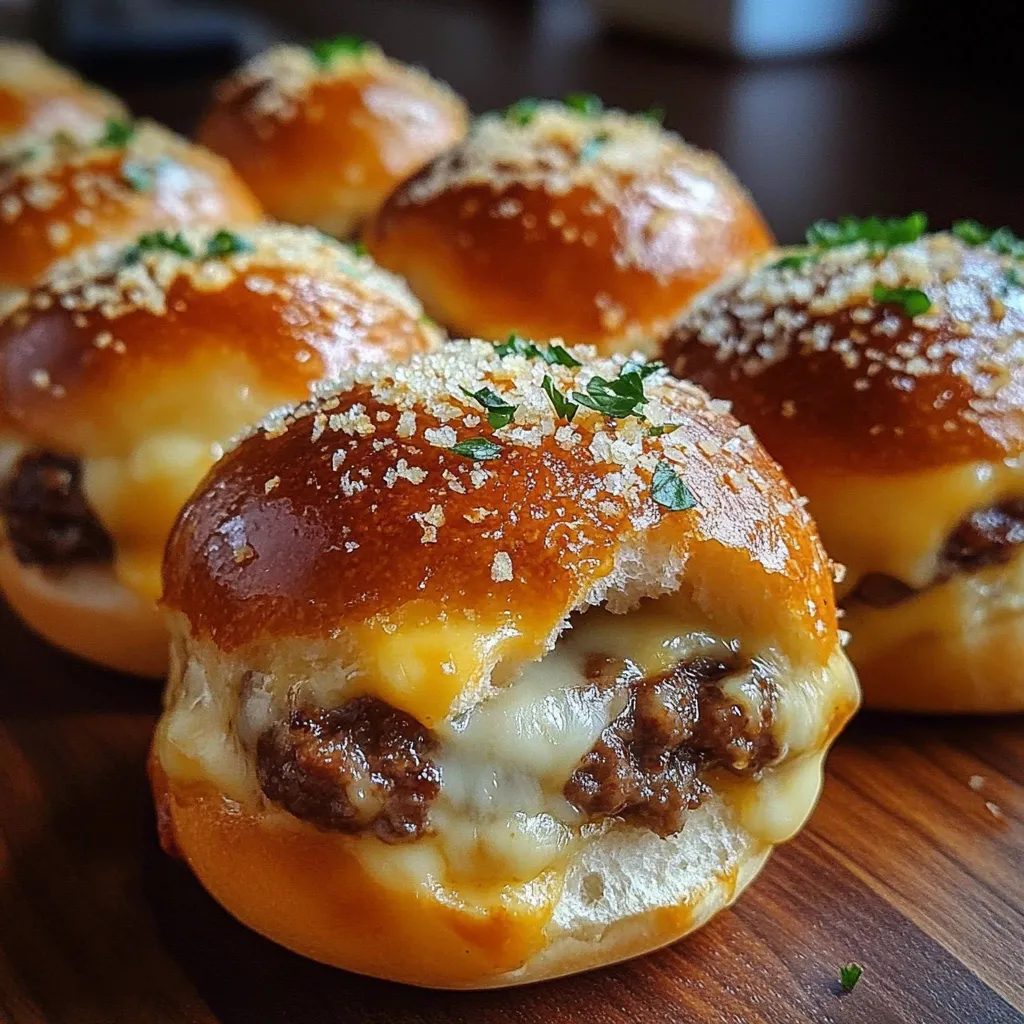
Garlic Parmesan Cheeseburger Bombs capture the craveable flavors of a classic cheeseburger in soft, golden-baked bites you can eat by hand. They are perfect for game nights, parties, or simply when you want something fun for dinner without firing up the grill. The cheesy beef filling and buttery garlic topping always get a huge response at my table—no one believes how quick these are to make.
I first whipped these up for an impromptu movie night when my kids begged for burgers but I was out of buns. Now everyone gets excited when they see these cheesy bombs on the dinner plan.
Ingredients
- Ground beef: Brings the classic burger taste and a juicy filling. Choose eighty five to ninety percent lean for richness without excess grease
- Seasonings: Like salt, pepper, garlic powder, and onion powder build the signature cheeseburger flavor profile. Freshly ground pepper adds a punch
- Worcestershire sauce: Deepens the umami and makes the filling truly craveable. Opt for a brand with minimal additives
- Shredded cheddar or mozzarella: Makes each bite gooey and melty. Pre-shredded saves time but block cheese melts a bit smoother
- Optional mix-ins: Such as crispy bacon, tangy pickles, or sweet caramelized onions let everyone personalize their bomb
- Refrigerated biscuit or pizza dough: Forms the pillowy soft exterior. Pizza dough gives a chewier shell while biscuit dough adds a bit of sweetness
- Melted butter: Brushed on top ensures the bombs come out golden and rich. Use unsalted for better control
- Minced garlic or garlic powder: In the topping turns every bite ultra fragrant
- Grated Parmesan: Delivers the salty nutty finish. Look for freshly grated if possible
- Chopped parsley: Gives a pop of color and freshness if you like
Step-by-Step Instructions
- Prepare the Filling:
- Brown ground beef in a large skillet over medium heat until fully cooked. Drain off any fat so the filling is not greasy. Sprinkle with salt, pepper, a generous shake of garlic and onion powder, plus the Worcestershire sauce. Stir to combine thoroughly so the seasonings coat the meat. Allow the mixture to cool for ten minutes then mix in your shredded cheese and any desired add-ins like bacon or pickles. Cooling is key so the cheese does not melt prematurely.
- Fill the Dough:
- Lay your dough rounds on a lightly floured surface and gently flatten each to about a quarter inch thick. Place one to two tablespoons of the cooled beef mixture in the center. Gather the dough up around the filling and pinch the edges closed firmly so none leaks out. Roll the sealed dough ball gently in your hands to smooth the seam.
- Arrange and Top:
- Set the balls seam side down on a parchment lined baking sheet allowing a little space between each for even browning. Mix the melted butter and garlic. Brush each bomb thoroughly and shower the tops with grated Parmesan for extra crunch and flavor.
- Bake:
- Preheat your oven to three hundred seventy five degrees Fahrenheit or one hundred ninety Celsius. Slide the tray in and bake for fifteen to eighteen minutes until the bombs are golden brown and the tops look crisp. Rotate the sheet once halfway for even color.
- Finish and Serve:
- As soon as they come out brush with more melted garlic butter if you like and sprinkle with fresh parsley. Serve warm with sauces for dipping—ranch, spicy mayo, or your favorite burger condiments.
I am hooked on the combo of garlicky butter and melted Parmesan on top. The way everyone gathers around when these come out of the oven brings me right back to our family weekends when the house was full of friends and laughter. Each time I make them I remember that first batch vanishing before I even sat down.
Storage Tips
If you have leftovers let them cool then store in an airtight container in the fridge for two days. Reheat in a toaster oven or air fryer so the tops stay crispy and the cheese inside gets melty again. They also freeze nicely—wrap cooled bombs in foil pop in a freezer bag and they will last up to six weeks. Warm straight from the freezer in a low oven until heated through.
Ingredient Substitutions
You can swap turkey or plant-based meat for ground beef if needed. Try pepper jack or Swiss cheese for a flavor twist. Crescent roll dough can stand in for biscuit dough in a pinch though the texture will be lighter. For a gluten free version use gluten free pizza dough but check baking times closely.
Serving Suggestions
These bombs are perfect on their own but pairing with dipping sauces really brings out the flavors. Lay out bowls of ranch, garlicky aioli, and spicy ketchup. For a main meal I like serving them with a crisp salad or homemade potato wedges. They also shine at parties stacked on a platter as the centerpiece.
These garlic Parmesan cheeseburger bombs are destined to become a new favorite for any gathering!
Recipe FAQs
- → What type of cheese works best for the filling?
Shredded cheddar or mozzarella melt well and complement the savory beef filling. Feel free to mix or substitute based on preference.
- → Can I add extras to the filling?
Absolutely! Bacon, pickles, or caramelized onions add extra layers of flavor to the cheesy beef mixture.
- → Is it necessary to use biscuit or pizza dough?
Both biscuit and pizza dough work great for these bombs, providing a soft and golden crust after baking.
- → How can I achieve a crispy, golden topping?
Brush each ball with melted garlic butter and sprinkle with Parmesan before baking for a flavorful, golden finish.
- → What sauces pair well as dips?
Serve with ranch, aioli, or spicy mayo to complement the cheesy, garlicky flavors of the bombs.
- → Can these be prepared in advance?
Yes, assemble and refrigerate the unbaked bombs, then bake just before serving for the best texture and flavor.