
 Pin it
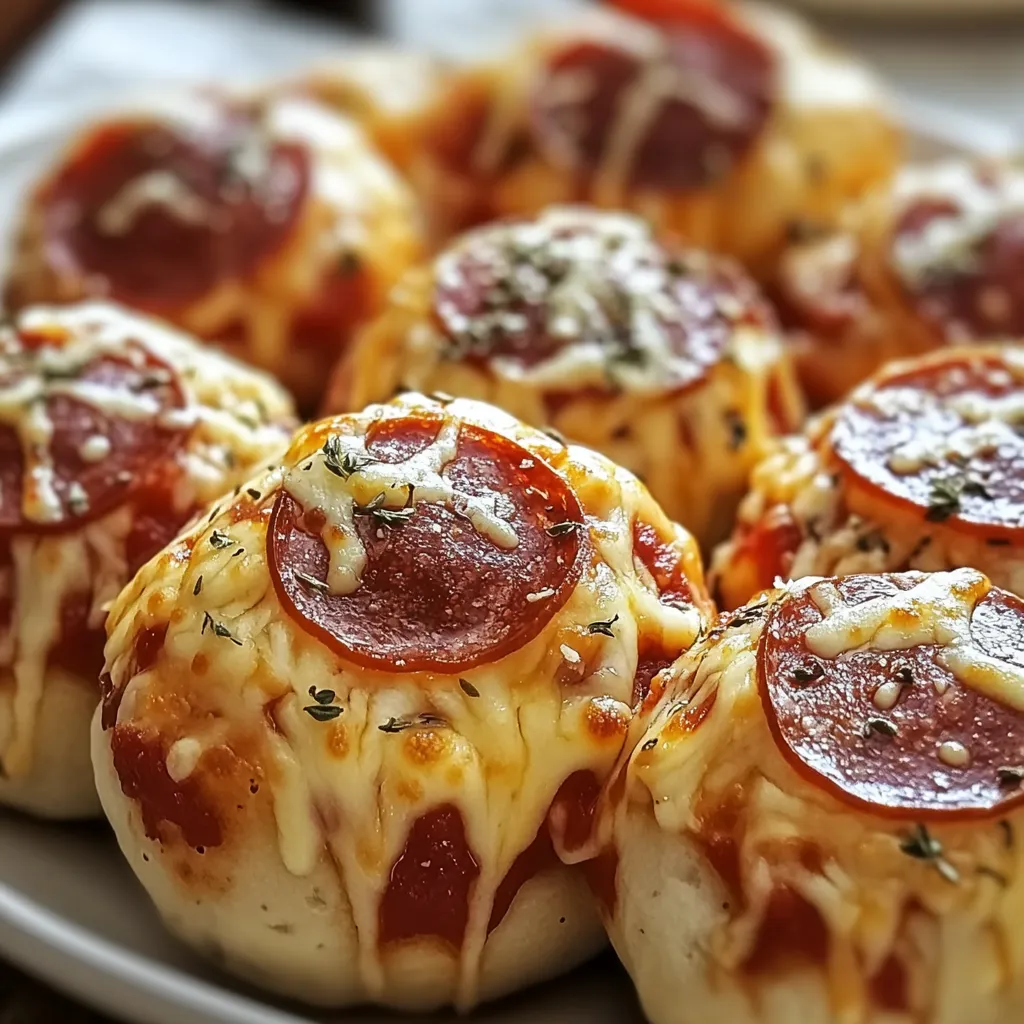
This cheesy pepperoni pizza bombs recipe transforms simple biscuit dough into irresistible bite-sized treats filled with gooey mozzarella, zesty marinara, and classic pepperoni. Perfect for game day snacking or a fun family dinner that will have everyone reaching for seconds.
I first made these pizza bombs for my nephews during a weekend sleepover, and they've become our mandatory movie night snack ever since. Even my brother who claims to be "culinarily challenged" has mastered these cheesy bites.
Ingredients
- 16.5 oz can of biscuit dough: Ensures perfect texture without making dough from scratch
- Marinara sauce: Provides classic pizza flavor; choose a high quality jar or make homemade
- Sliced pepperoni: Adds that classic pizza flavor; look for nitrate free if possible
- 8 oz ball of mozzarella cheese: Offers superior melting; use fresh for best results
- Butter: Creates a golden crispy exterior
- Garlic cloves: Fresh minced; adds aromatic depth
- Salt and pepper: Basic seasonings that enhance all flavors
- Italian seasoning blend: Provides authentic pizza herb flavor
- Parmesan cheese: Gives a nutty finish; use freshly grated if possible
Step-by-Step Instructions
- Preheat and Prepare:
- Heat your oven to 375°F while lining a baking sheet with parchment paper. The parchment prevents sticking while the butter adds flavor and helps achieve beautiful browning. Make sure to fully preheat your oven as proper temperature is crucial for the biscuit dough to rise properly.
- Prepare the Biscuits:
- Take each biscuit from the can and cut it in half to create sixteen smaller portions. Using your thumb, press each half into a flat circle about 3 inches in diameter. Work gently to avoid tearing the dough, creating a base that's thin enough to fold but sturdy enough to hold fillings.
- Add the Fillings:
- Place approximately one teaspoon of marinara in the center of each flattened biscuit followed by a slice of pepperoni and a cube of mozzarella. The key is not overfilling which could cause leakage during baking. The mozzarella cube should be roughly half-inch in size for the perfect cheese-to-dough ratio.
- Seal the Bombs:
- Carefully bring the edges of each dough circle up and over the fillings, pinching firmly to seal completely. This step requires attention to detail as any gaps will allow cheese to escape during baking. Roll each sealed bomb between your palms to ensure a uniform ball shape.
- Create the Garlic Butter:
- In a small bowl, combine three tablespoons of melted butter with two finely minced garlic cloves, a quarter teaspoon each of salt and pepper, and one tablespoon of Italian seasoning. Stir thoroughly to create a fragrant herbed butter that will elevate the flavor and appearance of your pizza bombs.
- Apply the Coating:
- Using a pastry brush, generously coat each sealed pizza bomb with the garlic butter mixture. Make sure to cover the entire surface for maximum flavor. After brushing with butter, sprinkle each bomb with a light dusting of Parmesan cheese which will create a delicious crispy crust.
- Bake to Perfection:
- Place the prepared pizza bombs in your preheated oven and bake for 15 to 20 minutes. You're looking for a deep golden brown color on the outside which indicates the dough is fully cooked. The cheese inside will melt completely, creating a molten center that stretches when pulled apart.
- Serve and Enjoy:
- Allow the pizza bombs to cool for approximately 5 minutes before serving. This brief resting period prevents burned mouths from the molten cheese interior. Arrange on a serving platter with a small bowl of warm marinara sauce for dipping, adding an extra layer of pizza flavor to each bite.
The fresh mozzarella is truly the star ingredient here. I discovered this accidentally when I ran out of shredded cheese one day and used cubed fresh mozzarella instead. The way it creates those perfect cheese pulls when you bite into a warm pizza bomb makes all the difference in the world. My family now refuses to eat them made any other way.
Make Ahead Options
These pizza bombs can be fully prepared up to the baking stage and refrigerated for up to 24 hours before cooking. Simply cover the prepared bombs tightly with plastic wrap on the baking sheet. When ready to bake, remove from the refrigerator, brush with the garlic butter mixture, and add an extra 2 to 3 minutes to the baking time. This makes them perfect for preparing in advance of parties or gatherings.
Creative Variations
While the classic pepperoni version is always a crowd pleaser, these pizza bombs welcome customization. Try filling them with cooked sausage and bell peppers for a supreme pizza version. Vegetarian options work beautifully too with combinations like spinach and feta or roasted vegetables and pesto. For spice lovers, add a pinch of red pepper flakes to the filling or mix buffalo sauce with the marinara for a fiery twist. The possibilities are as endless as your pizza topping preferences.
Serving Suggestions
These bombs make an excellent appetizer served on their own but can also be transformed into a complete meal. Pair them with a crisp green salad dressed with Italian vinaigrette for a balanced dinner. They also complement soup wonderfully, especially tomato bisque or minestrone. For a game day spread, serve alongside other finger foods like chicken wings, vegetable platters, and loaded potato skins. The individual portion size makes them perfect for buffet style service.

The perfect combination of crispy and gooey, these pizza bombs are sure to impress everyone at the table. Enjoy them warm for the ultimate pizza experience!
Recipe FAQs
- → Can I use homemade dough instead of canned biscuit dough?
Yes, you can substitute homemade pizza dough or bread dough for the canned biscuit dough. Just make sure to divide it into similar-sized portions and follow the same assembly instructions.
- → How do I prevent the cheese from leaking out during baking?
Make sure to completely seal the edges of the dough when forming each bomb. Press firmly to create a tight seal with no gaps. You can also try using cheese cubes rather than shredded cheese to minimize leakage.
- → Can I make these ahead of time?
You can prepare the pizza bombs up to the point of baking and refrigerate them for up to 24 hours. When ready to serve, brush with the garlic butter mixture and bake as directed, adding a few extra minutes to the baking time.
- → What other fillings can I use?
These bombs are versatile! Try ham and cheese, buffalo chicken with blue cheese, spinach and feta, or even sweet variations like cinnamon sugar with cream cheese. Just ensure your fillings aren't too wet to prevent soggy bombs.
- → How do I store and reheat leftovers?
Store cooled pizza bombs in an airtight container in the refrigerator for up to 3 days. Reheat in a 350°F oven for 5-7 minutes or in the microwave for 20-30 seconds until warmed through.
- → Can I freeze these pizza bombs?
Yes! Freeze them either before or after baking. To freeze before baking, place assembled bombs on a baking sheet until frozen solid, then transfer to a freezer bag. When ready to bake, add 5-7 minutes to the baking time. For baked bombs, reheat from frozen in a 350°F oven for 10-15 minutes.