
 Pin it
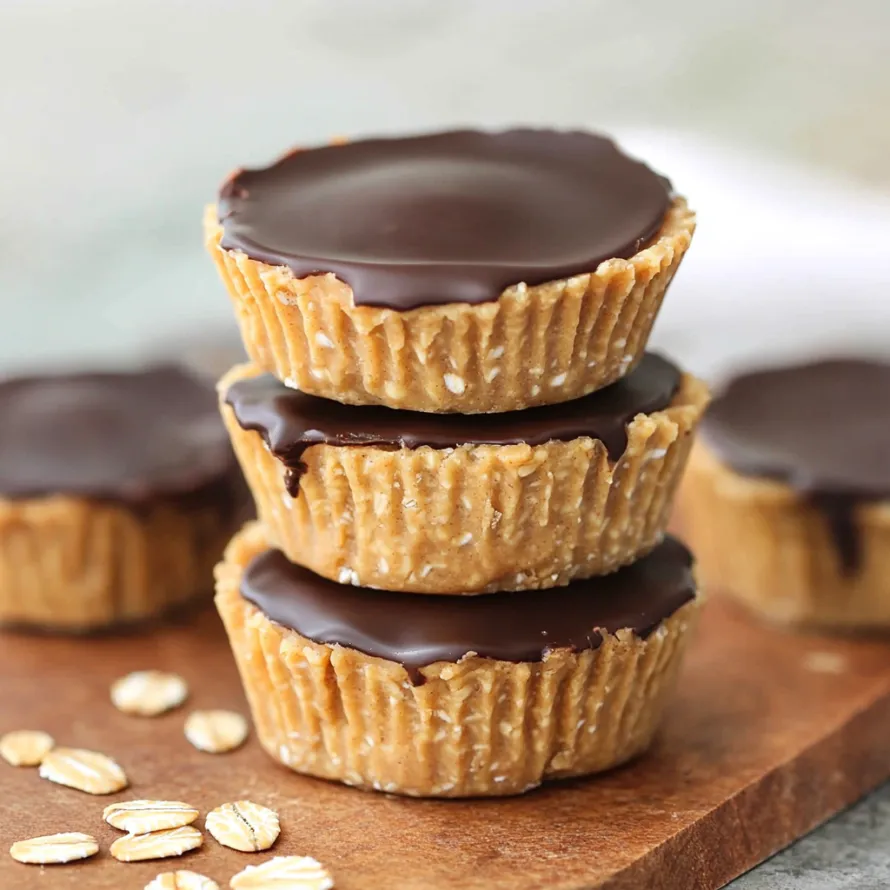
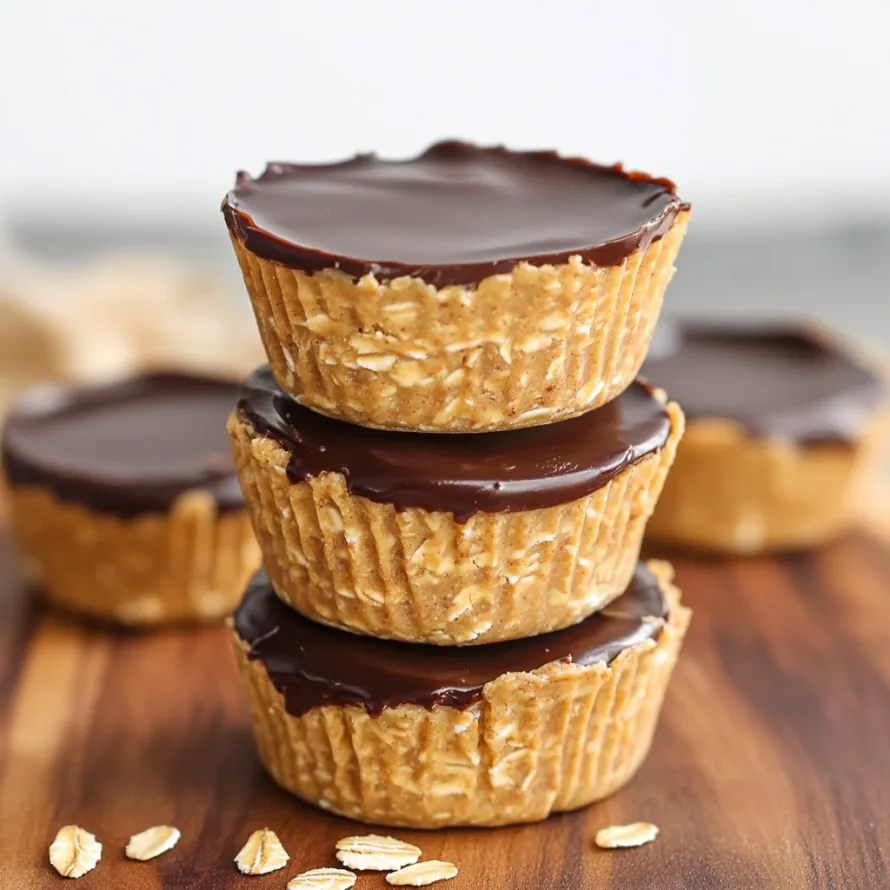
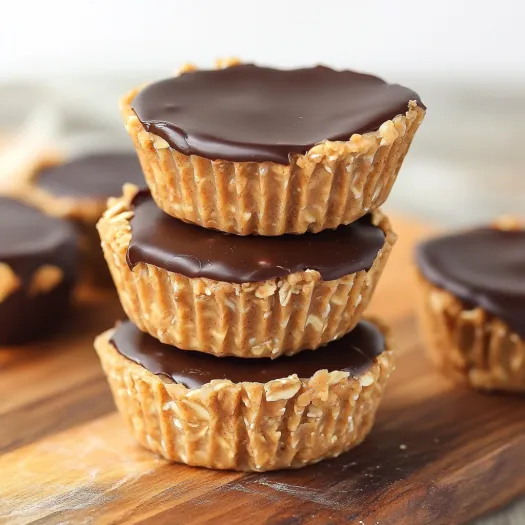
Transform simple pantry ingredients into irresistible treats with these no-bake peanut butter oat cups that satisfy sweet cravings without the guilt. These wholesome cups combine the hearty texture of oats with smooth peanut butter and rich chocolate for a dessert that feels indulgent while providing genuine nutritional benefits. Unlike conventional candy cups loaded with refined sugar and preservatives, these homemade treats deliver protein, fiber, and healthy fats in each delicious bite.
I discovered this recipe during a summer heatwave when turning on the oven seemed unbearable but my sweet tooth was undeniable. The first batch disappeared from my refrigerator within two days. Now they feature regularly in my weekly meal prep routine.
Wholesome Foundation Ingredients
- Oat flour: Creates the perfect hearty base while adding significant fiber content.
- Peanut butter: Serves as both binding agent and star flavor while contributing protein and healthy fats.
- Maple syrup: Provides natural sweetness with complex flavor notes that complement the nuttiness.
- Chocolate chips: Creates the irresistible topping that completes the flavor profile.
- Coconut oil: Helps the chocolate melt smoothly and creates a glossy finish.
Perfect Preparation
- Peanut Butter Foundation:
- Combine peanut butter and maple syrup, then warm slightly until smooth.
- Oat Integration:
- Gradually add oat flour, stirring continuously until a cookie dough-like consistency forms.
- Cup Formation:
- Divide the mixture into muffin liners, pressing firmly to form a base.
- Chocolate Topping Preparation:
- Melt chocolate chips with coconut oil until smooth.
- Final Assembly:
- Pour the melted chocolate over the oat bases and smooth the tops.
- Proper Setting:
- Refrigerate for at least 2-3 hours until completely firm.
Flavor Variations
Create chocolate hazelnut cups by substituting hazelnut butter for peanut butter. Transform them into seasonal pumpkin spice cups by adding pumpkin pie spice. Develop coconut almond cups by using almond butter and sprinkling toasted coconut atop the chocolate layer.
Nutritional Enhancements
Boost the nutritional profile with thoughtful additions. Incorporate ground flaxseed or chia seeds for omega-3 fatty acids and fiber. Add a scoop of unflavored collagen peptides or protein powder. Mix in finely chopped dried fruits such as tart cherries or blueberries for additional antioxidants.
Serving Suggestions
Pair with fresh berries for a balanced dessert. Crumble over frozen yogurt for a deconstructed sundae. Include in lunchboxes for a sweet yet healthy snack. Arrange on a dessert board with fruit, cheese, and chocolate for an elegant presentation.
Storage Success
Refrigerate in an airtight container for up to five days. Freeze individual cups by wrapping in parchment paper and placing in a freezer bag for up to one month. Allow frozen cups to thaw for 10-15 minutes before enjoying.
I learned the importance of proper chocolate melting while teaching a children’s cooking class. One child overheated the chocolate, causing it to seize. Rather than discarding it, we created chocolate chunk oat cups instead. Sometimes kitchen mistakes lead to delicious innovations.
Final Thoughts
No-bake peanut butter oat cups are an easy, nutritious, and satisfying treat that fits effortlessly into any routine. Whether enjoyed as a snack, dessert, or post-workout bite, they offer a perfect balance of flavor and health benefits.
Recipe FAQs
- → Can I use natural peanut butter for these oat cups?
- Yes, you can use natural peanut butter, though the texture may vary slightly. Make sure to stir it well before measuring to incorporate any separated oils. Natural peanut butter sometimes creates a slightly drier mixture, so you might need to add an extra teaspoon or two of maple syrup to achieve the right consistency.
- → Can I make these peanut butter oat cups gluten free?
- Absolutely! Oats are naturally gluten free, but they're often processed in facilities that also handle wheat products. Simply use certified gluten free oats or oat flour to ensure these treats are completely gluten free. The rest of the ingredients are typically gluten free, but always check your chocolate chips to be sure.
- → What can I substitute for maple syrup?
- Honey works as an excellent substitute for maple syrup in equal amounts, though it will change the flavor profile slightly. Agave nectar is another good option. For a lower sugar version, you can try using 2-3 tablespoons of monk fruit sweetener mixed with 1 tablespoon of water, though this may affect the binding properties of the mixture.
- → How do I know if my peanut butter oat mixture has the right consistency?
- The perfect consistency for the peanut butter oat mixture should be thick enough to hold its shape when pressed, but still somewhat pliable. It should not be runny or too sticky. If you can form it into a ball that holds together without crumbling apart, you've got the right consistency. If it's too dry, add maple syrup or peanut butter one teaspoon at a time; if too wet, add more oat flour.
- → Can I make these without chocolate on top?
- Yes, these peanut butter oat cups are delicious even without the chocolate layer! If you prefer, you can mix 2-3 tablespoons of mini chocolate chips directly into the peanut butter oat mixture instead of adding a chocolate topping. You could also top them with a drizzle of melted peanut butter or a sprinkle of cinnamon sugar for variety.
- → Can I freeze these peanut butter oat cups?
- Definitely! These cups freeze beautifully for up to 3 months. Place them in an airtight container with parchment paper between layers to prevent sticking. Allow them to thaw in the refrigerator for 2-3 hours before enjoying, or eat them straight from the freezer for a more firmly textured treat that thaws quickly in your mouth.