
 Pin it
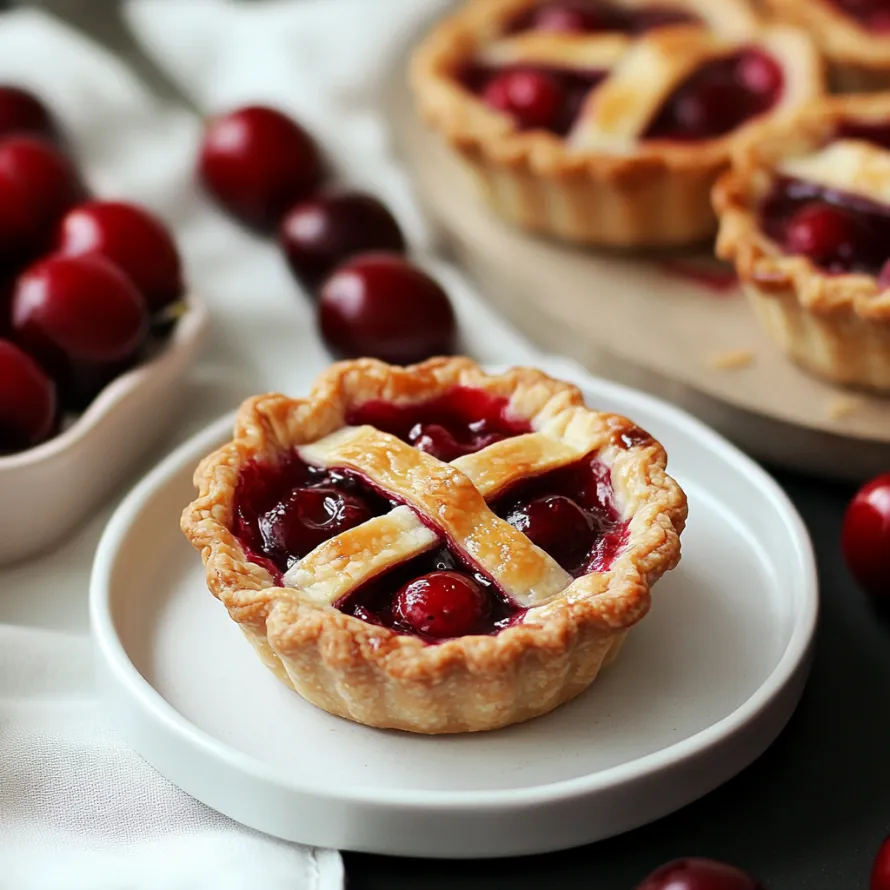
This mini cherry pie recipe transforms sweet summer cherries into adorable hand-held treats with flaky crusts and jammy centers. The perfect blend of sweet and tart flavors makes these individual pies irresistible for any gathering or simple dessert craving.
I first made these mini cherry pies for a family reunion where I needed a dessert that was both portable and pretty. The moment my cousins saw the lattice tops, they assumed I'd spent hours in the kitchen, but these little beauties are surprisingly simple to create.
Ingredients
- Fresh cherries: Provide the perfect balance of sweet and tart flavor, specifically choose dark sweet cherries for best results
- Cornstarch: Thickens the filling, preventing runny pies and ensuring each bite holds together
- Almond extract: Enhances the natural cherry flavor but remains optional for those with nut allergies
- Coarse sugar: Adds a professional bakery finish and delightful crunch to the tops
- Dark colored muffin pan: Yields crispier golden crusts than light aluminum options
Step-by-Step Instructions
- Prepare cherry filling:
- Combine pitted quartered cherries with sugar, cornstarch, salt, lemon juice, and extracts in a medium bowl. The sugar draws moisture from the cherries through maceration, creating the perfect jammy filling consistency after resting 10 minutes.
- Roll out pie crusts:
- Roll first chilled pie crust on lightly floured surface to 11 to 12 inches in diameter, turning dough quarter turns to prevent sticking. Roll only from center outward for best texture. Use 4-inch circle cutter to create 8 or 9 dough rounds for muffin cups.
- Form mini pie shells:
- Press each dough circle gently into muffin cups, using one hand to guide edges down while pressing center with fingertips. This technique prevents tearing, but any small holes can be patched with excess dough.
- Fill the pies:
- Add one tablespoon of cherries into each formed crust, followed by distributing the accumulated cherry liquid evenly between all pies (about one tablespoon per pie). The separated filling process ensures even distribution.
- Create lattice tops:
- Cut remaining dough into quarter-inch strips. Arrange half vertically, then fold alternate strips back. Place horizontal strip across, then fold vertical strips over, creating classic lattice pattern. Cut finished lattice into 2.5-inch circles and place atop each filled pie.
- Finish and bake:
- Brush lattice tops with beaten egg and sprinkle with coarse sugar for shine and crunch. Bake at 375°F for 22 to 25 minutes until golden brown with bubbling filling.
- Cool properly:
- Allow pies to rest 5 minutes in pan, then carefully remove and place on wire rack to finish cooling, which prevents soggy bottoms from residual steam.
The almond extract is my secret weapon in this recipe. My grandmother always added it to her cherry desserts, claiming it amplifies the natural cherry flavor. The first time I made these without it, the difference was immediately noticeable — everyone asked what was missing.
Make Ahead Options
These mini cherry pies store remarkably well, making them perfect for planning ahead. After cooling completely, place them in an airtight container and store at room temperature for up to 2 days. For longer storage, refrigerate for up to 5 days, though the crust may soften slightly. To recrisp, simply warm in a 300°F oven for 5 minutes before serving.
Fruit Variations
While cherries are the star of this recipe, the technique works beautifully with other fruits. Blueberries require slightly less cornstarch as they release less liquid. Diced apples need a quick 5-minute stovetop precook to soften before filling. Mixed berries create a gorgeous jewel-toned filling, but increase cornstarch to 3 tablespoons to account for their higher water content.
Serving Suggestions
These mini pies shine on their own, but elevate them further with thoughtful accompaniments. A small scoop of vanilla bean ice cream creates a delightful temperature contrast with the pie. Lightly sweetened whipped cream with a hint of almond extract complements the cherry flavor. For a more sophisticated presentation, dust plates with powdered sugar and add a sprig of fresh mint.
These mini pies are not only delicious but also a fun way to celebrate cherry season with loved ones. Their portability and charm will make them a hit every time you serve them!
Recipe FAQs
- → Can I use frozen cherries for these mini pies?
Yes, frozen cherries work well! Thaw them completely and drain excess liquid before mixing with the sugar and cornstarch. You may need to add 1-2 extra minutes to the baking time.
- → How do I store leftover mini cherry pies?
Store cooled pies in an airtight container at room temperature for up to 2 days, or refrigerate for up to 5 days. Reheat in a 300°F oven for 5-10 minutes to restore crispness.
- → Can I make these without the lattice top?
Absolutely! You can use a solid top crust with slits cut for steam vents, or create a crumble topping with butter, flour, and sugar for a different texture.
- → What's the best way to pit cherries?
A cherry pitter tool works best, but you can also use a paperclip (unfolded into an S-shape), a pastry tip, or even a chopstick to push the pit out through the stem end.
- → Can I make these mini cherry pies ahead of time?
Yes! You can prepare the filling and dough up to 2 days ahead and store separately in the refrigerator. Alternatively, bake the pies completely, cool thoroughly, and freeze for up to 3 months in an airtight container.