
 Pin it
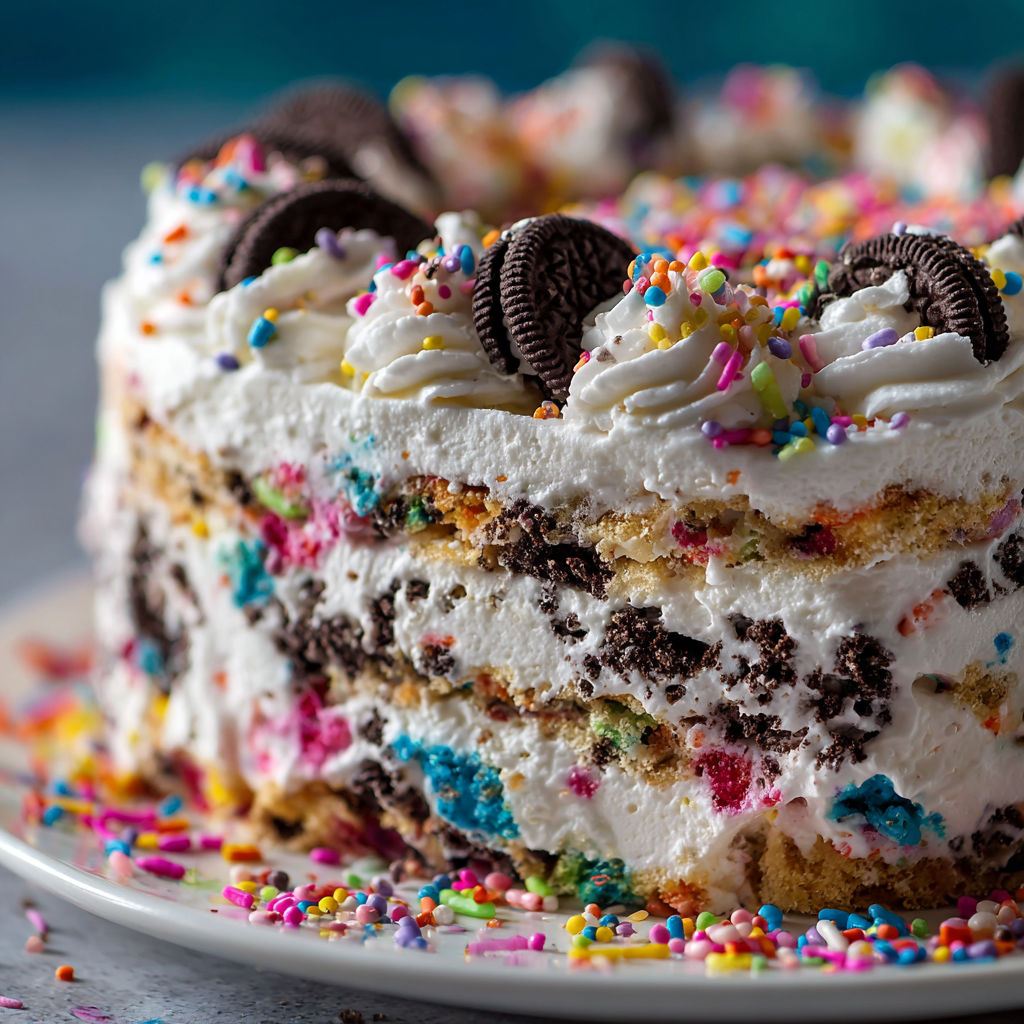
No oven needed and guaranteed to light up any celebration this No Bake Funfetti Oreo Icebox Cake layers birthday cake Oreos soft whipped cream cream cheese and a confetti of rainbow sprinkles The first time I made this for my niece’s birthday every kid at the table wanted seconds and now it is a staple for our summer cookouts
I whipped this up on a lazy afternoon thinking it might be too simple but everyone raved about it The best part might be the soft Oreo texture after soaking up the cream
Ingredients
- Birthday Cake Oreos: bring that classic celebratory flavor and the fun of sprinkles inside Select fresh Oreos for the best texture
- Milk: for dipping Oreos this softens each cookie for a cake like bite Whole milk is preferred for extra richness
- Heavy whipping cream: creates a plush luscious filling Choose cold cream for maximum volume
- Confectioners sugar: sweetens the whipped cream without grittiness Look for finely sifted powder
- Dry white cake mix: amps up the birthday cake flavor Use high quality cake mix for best results
- Cream cheese: gives the filling its tang and body Softened to room temperature for smooth blending
- Granulated sugar: balances the tang of the cream cheese
- Vanilla extract: adds a depth of flavor Pure vanilla will make a difference
- Rainbow sprinkles: use classic jimmies to keep colors bold and prevent bleeding into the cream
- Extra whipped cream and sprinkles: for topping because more is more
Instructions
- Whip the Cream:
- In a large cold bowl use electric beaters to whip the heavy cream to soft peaks The cream should billow but not be stiff yet Add confectioners sugar and cake mix then whip until stiff peaks form Take care not to overwhip Fold in the rainbow sprinkles gently They should stay whole and colorful Set this bowl aside in the fridge
- Make the Cream Cheese Filling:
- In a separate large bowl beat the softened cream cheese with granulated sugar and vanilla extract Beat at medium speed until totally smooth and fluffy This can take several minutes Stop to scrape the bowl at least once
- Combine and Finish the Cream:
- Using a spatula fold the whipped cream mixture gently into the cream cheese avoid deflating the airiness Mix until fully combined with no visible streaks This filling should hold its shape and look pillowy
- Prep the Pan:
- Lightly coat your springform pan with a thin layer of butter or baking spray Spread a small dollop of the cream mixture on the bottom to anchor the cookie layer
- Layer the Oreos:
- Pour milk into a shallow dish Quickly dip each Oreo just for a second or two and immediately line the bottom of the pan with a single even layer Repeat until the base is covered but not overcrowded
- Build the Cake:
- Spread about one third of the cream mixture over the first Oreo layer Use an offset spatula to reach the edges Repeat Oreo dipping and cream spreading for two more layers finishing with the remaining cream on top Smooth out the top for a neat presentation
- Chill to Set:
- Cover the pan with plastic wrap or foil and refrigerate for at least four to six hours but overnight is best This allows the cookies to absorb moisture and everything firms up to slice cleanly
- Decorate and Serve:
- Just before serving add swirls of extra whipped cream and dust generously with sprinkles Slice with a sharp knife dipped in hot water for clean edges Serve chilled
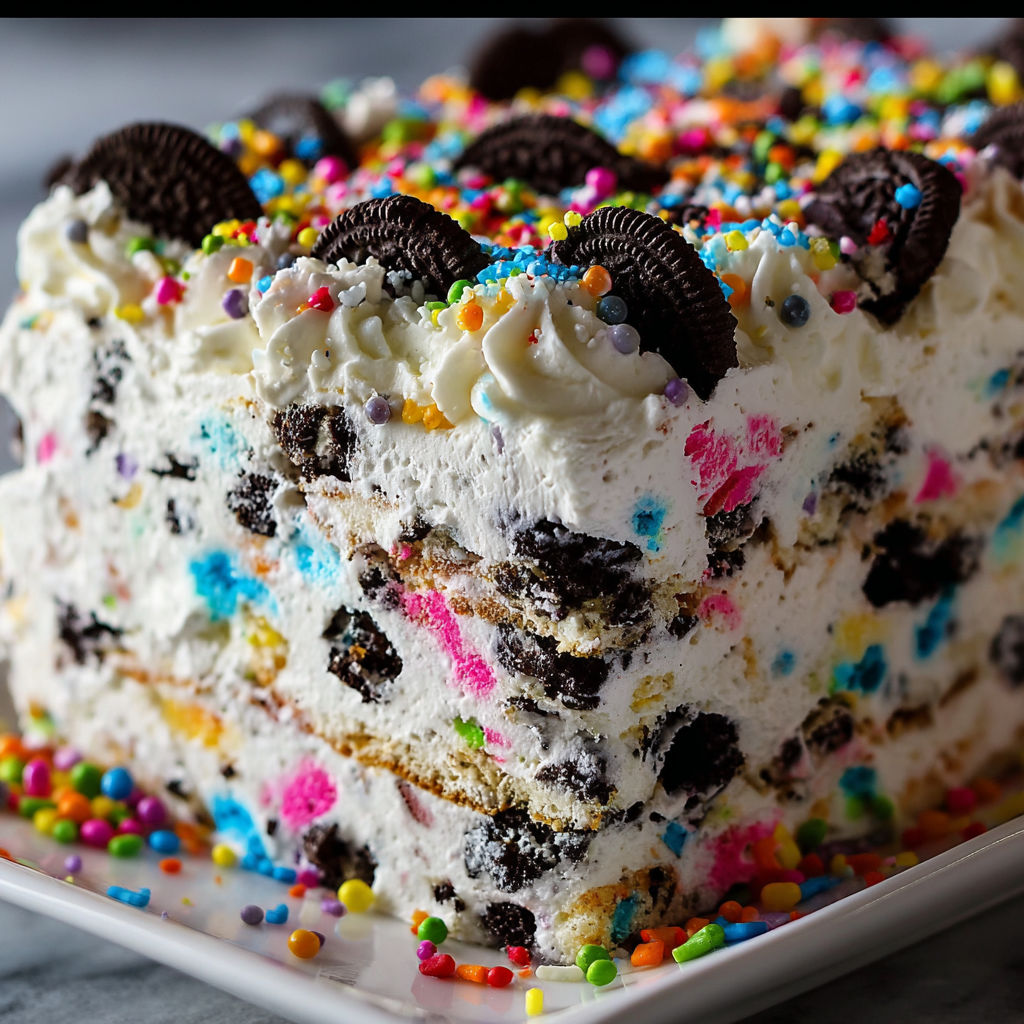
My favorite part is sneaking a few birthday cake Oreos for snacking while assembling The way each layer blends together always reminds me of my childhood family gatherings piled around the table with laughter and sprinkles everywhere
Storage Tips
Store leftover cake in the springform pan covered tightly with plastic wrap For longer storage transfer individual slices to an airtight container The texture holds best when consumed within three days For even longer storage the cake can be frozen Before topping with whipped cream wrap rounds of cake tightly in plastic and freeze up to one month Thaw overnight in the fridge for best results
Ingredient Substitutions
If you cannot find birthday cake Oreos use regular golden Oreos and add a few extra spoonfuls of sprinkles to the filling For a slightly less sweet dessert swap some of the confectioners sugar for additional cream cheese The cake mix adds a signature flavor but you can leave it out and bump up vanilla if needed The recipe adapts well to gluten free sandwich cookies and non dairy whipped toppings if allergies are a concern
Serving Suggestions
Serve extra cold on a hot day with strawberry slices on the side For a party try decorating each slice with colored candles for a fun birthday surprise You can add chocolate shavings or sparkly edible glitter for an extra festive touch Leftovers make a great afternoon snack with coffee or tea

Chill this cake thoroughly so each slice is picture perfect and creamy Serve cold and enjoy the party in every bite
Recipe FAQs
- → What type of Oreos should I use?
Birthday Cake Oreos add extra sweetness, but any sandwich cookie can work for this layered treat.
- → Can I substitute the heavy cream?
Stabilized whipped topping or coconut cream may be used, but heavy cream provides the best texture.
- → Do I have to use white cake mix?
Cake mix adds cake flavor, but if unavailable, a bit more sugar and vanilla can provide sweetness.
- → How far in advance can I assemble it?
It's best prepared the night before, allowing at least 4–6 hours for layers to set in the refrigerator.
- → Can I freeze the dessert?
This cake freezes well; thaw in the fridge before serving to maintain a creamy, sliceable texture.