
 Pin it
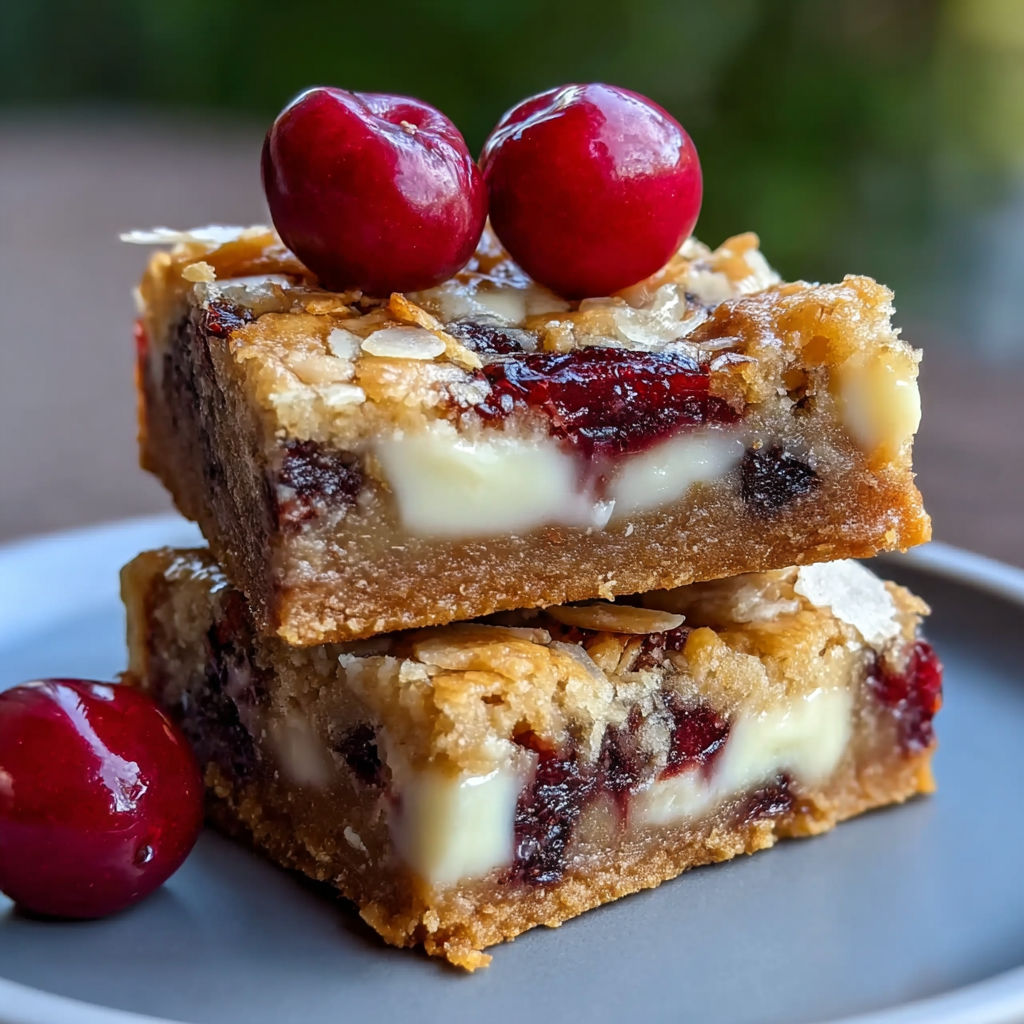
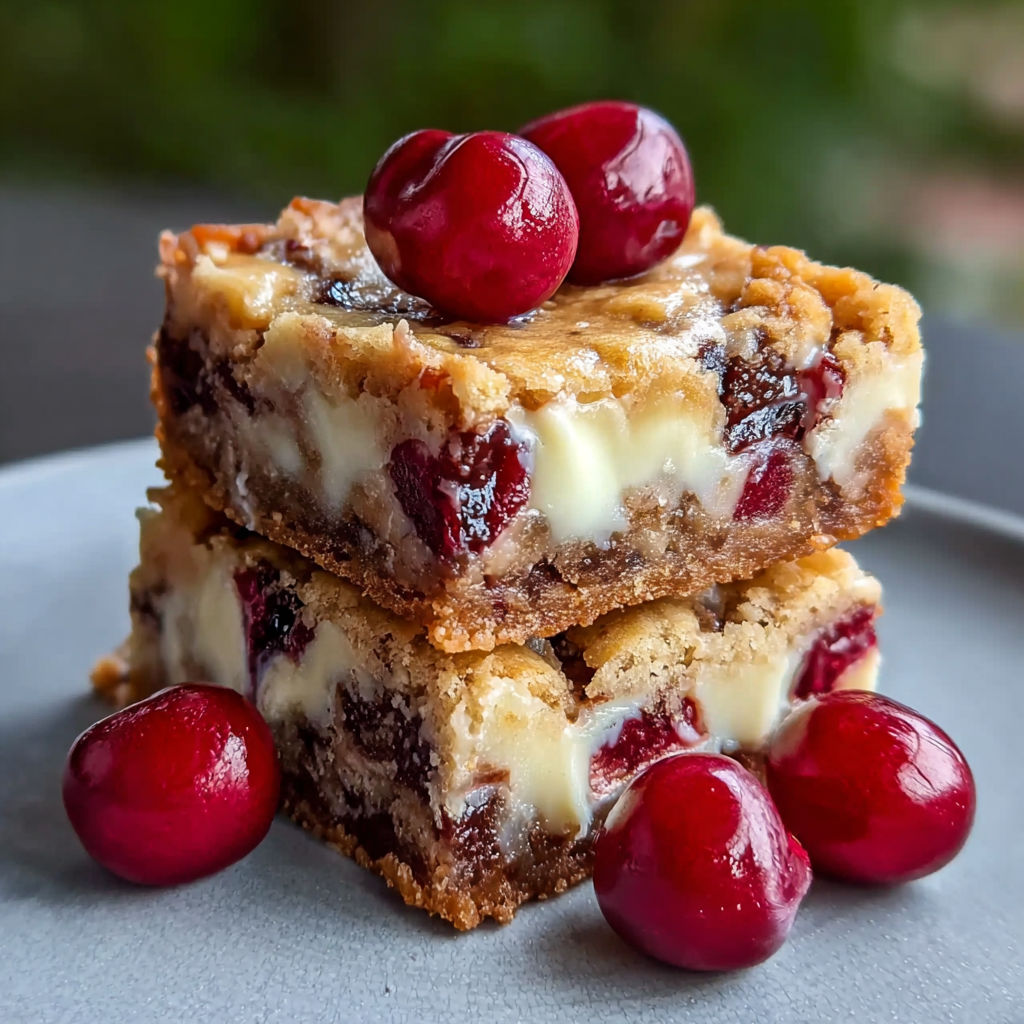
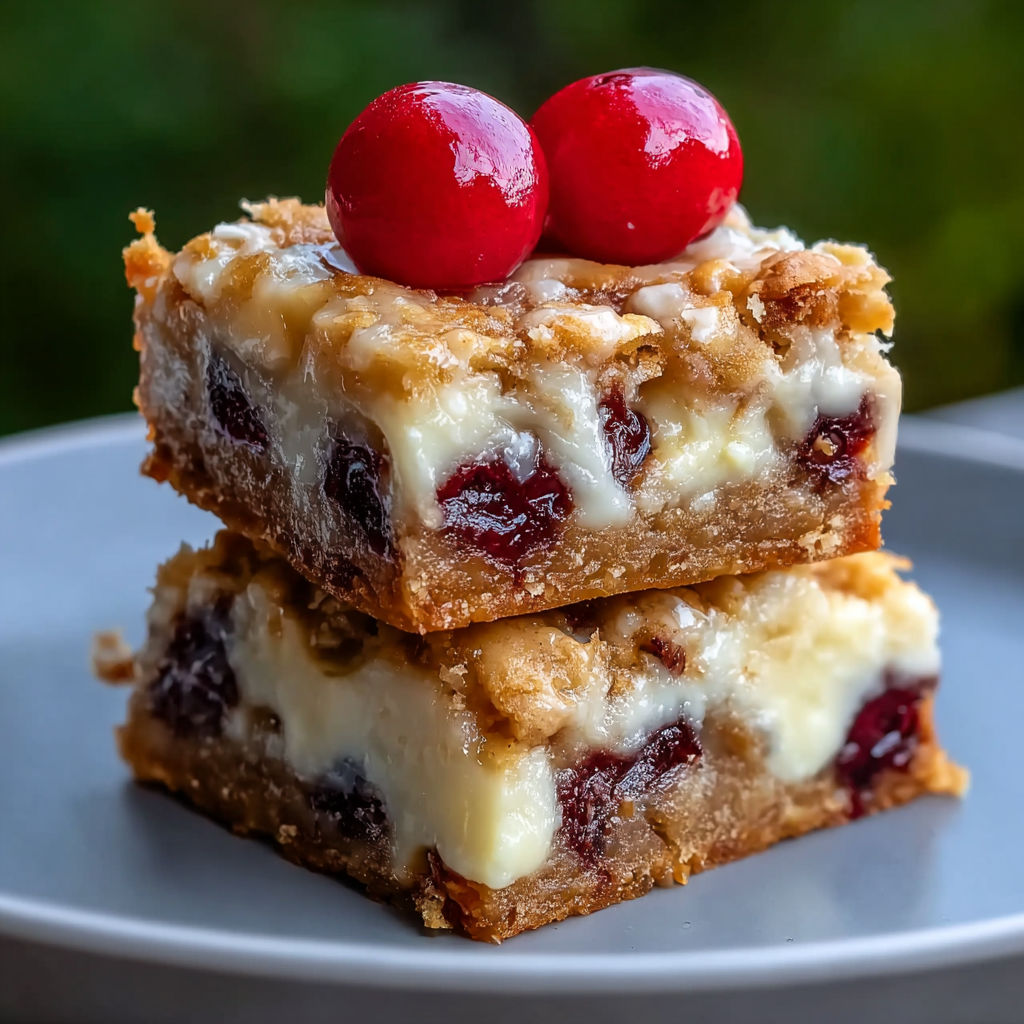
Tins of sweetened condensed milk and bags of graham crackers have meant only one thing in my kitchen for decades — these Christmas bars that are gooey buttery and crammed with chocolate and marshmallow. If you are looking for a nearly effortless holiday treat to delight a crowd these bars might just become your new seasonal tradition too.
I first baked a batch with my grandmother on Christmas Eve and we stood by the counter sneaking warm edge pieces. It is now the recipe I am asked for every time I host a holiday party.
Ingredients
- Graham cracker crumbs: Provide a sweet crunchy base and can be made by crushing whole crackers. For best flavor use honey or cinnamon graham crackers.
- Unsweetened cocoa powder: Gives rich chocolate flavor. High quality Dutch process cocoa makes these extra decadent.
- Powdered sugar: Sweetens the bars and adds that signature fudgy texture. Sift it to avoid lumps.
- Unsalted butter, melted: Brings everything together with richness. Choose European style butter for a silkier mouthfeel.
- Sweetened condensed milk: Is the secret to a chewy moist bar. Use full fat for the most luxurious bite.
- Mini marshmallows: Add a chewy fun texture. Smaller ones melt in more evenly so your bars have those wonderful pockets throughout.
- Chocolate chips: Bring that classic holiday chocolate goodness. Dark or milk chocolate both shine and look for a brand that uses real cocoa butter.
- Chopped nuts (walnuts or pecans, optional): Give a festive crunch. Use fresh nuts and toast lightly for a deeper flavor or go without for nut allergies.
Instructions
- Preheat the Oven:
- Begin by setting your oven to 350 degrees Fahrenheit or 175 degrees Celsius. Allow it to preheat fully so the bars cook evenly from edge to center. A properly heated oven is the backbone of perfect bar texture.
- Mix Dry Ingredients:
- In a large mixing bowl whisk together the graham cracker crumbs cocoa powder and powdered sugar. Take time to break up all lumps and ensure even color distribution. The aroma as the cocoa blends is the first hint of the chocolate joy to come.
- Add Wet Ingredients:
- Pour the melted butter and sweetened condensed milk over your dry mixture. Stir with a stout spoon until a thick cohesive dough forms. It will look glossy yet sticky and you want every crumb moistened. Do not worry if it clings to the spoon — that is what makes every bite luscious.
- Fold in Mixins:
- Add the mini marshmallows chocolate chips and if you are using them nuts. Fold gently so the marshmallows keep their puffiness and the chips stay whole. Even distribution here means each bar will have a little bit of everything.
- Spread and Bake:
- Grease a baking pan thoroughly then press the dough in using a spatula to get an even flat layer. Smooth the surface gently so the finished bars all have the same thickness. Place the pan in the middle rack and bake for twenty five to thirty minutes. You are looking for set edges and a center that is just barely firm. The kitchen will smell like fond holiday memories.
- Cool and Cut:
- Once baked remove from the oven and let the pan cool on a wire rack for at least an hour. This wait is key for clean slicing. Once completely cooled use a sharp knife dipped in hot water and wiped dry between cuts for flawless bakery style squares. Smaller pieces are perfect for sharing on cookie trays or tucking into gifts.
My favorite part is biting into a piece with a toasted marshmallow edge. It tastes like a holiday campfire on a cookie tray. My youngest always picks out the chocolate chunks and insists those are the best part.
Storage Tips
Store extras in an airtight container at room temperature and they will stay soft for up to a week. If your house is warm place them in the fridge but let them come to room temperature before serving for ideal chewiness. You can also wrap bars individually in wax paper for gifting.
Ingredient Substitutions
For gluten free use gluten free graham crackers and ensure your other ingredients are certified safe. You can swap coconut oil for butter if you need a dairy free version. Dark chocolate chips are delicious if you prefer less sweetness or try butterscotch chips for a playful spin.
Serving Suggestions
Arrange bars on a platter with peppermint bark or espresso shortbreads for a festive sweets lineup. Dust with extra powdered sugar to mimic freshly fallen snow. These are fantastic with strong tea or hot chocolate for an afternoon treat.
Cultural and Holiday Touch
Christmas bars like these are a staple in American Midwest cookie exchanges. They are easy for kids to help make and have that unmistakable holiday flavor combo. Graham crackers chocolate and marshmallow remind many of cozy winter nights by the fire.
Seasonal Adaptations
Add dried cranberries or cherries for a fruity festive twist. Mix in crushed candy canes for a minty crunch. Top with a sprinkle of flaky salt before baking to enhance flavors.
Success Stories
I once baked these with all the neighborhood kids and every batch disappeared before we even got them on a tray. These bars have a way of bringing people together. Adults try to sneak seconds and kids go straight for that perfect gooey corner piece.
Freezer Meal Conversion
You can freeze these bars after baking. Let them cool completely then layer between parchment in an airtight container. Freeze for up to two months. Thaw at room temperature overnight and they taste just as good as fresh. I always squirrel a batch away in the deep freeze for winter cravings.
Christmas bars are the ultimate shareable treat and perfect for holiday gatherings. Make a batch and watch them disappear faster than the winter snow.
Recipe FAQs
- → Can I use regular marshmallows instead of mini?
Yes, regular marshmallows can be chopped into smaller pieces, but mini marshmallows are recommended for even distribution and a lighter texture.
- → What can I substitute for unsalted butter?
Melted coconut oil is a great alternative to butter, especially for a dairy-free option. It gives a slightly different flavor but still binds the mixture well.
- → How do I know when the bars are baked?
The bars are ready when the edges are set, and the center is slightly firm to touch. Overbaking can dry them out, so keep a close eye during the last minutes of baking.
- → Can I leave out the nuts?
Absolutely, the nuts are optional and can be omitted for allergies or preference without affecting the bars’ texture.
- → How should I store the finished bars?
Once cooled and cut, store the bars in an airtight container at room temperature for up to five days, or refrigerate for longer freshness.
- → Is it necessary to line or grease the baking pan?
Yes, greasing the pan prevents sticking and makes it easy to remove the bars once they’re cooled and set.